
Aquecimento de Piso em Pavilhão de Leitões: Zonas Quentes Duradouras
Os leitões recém-nascidos não se conseguem manter quentes. Perdem calor rapidamente, encolhem-se para se aquecer, e uma área de creep fria é exatamente o tipo de stress silencioso que aparece depois como fraco ganho de peso. Um piso aquecido sob o creep é a solução mais confiável que um pavilhão pode ter — este caso cobre aquecimento de piso de pavilhão de leitões, o que um pavilhão dividido precisa, e como o piso é aplicado para durar num ambiente de quinta de trabalho.
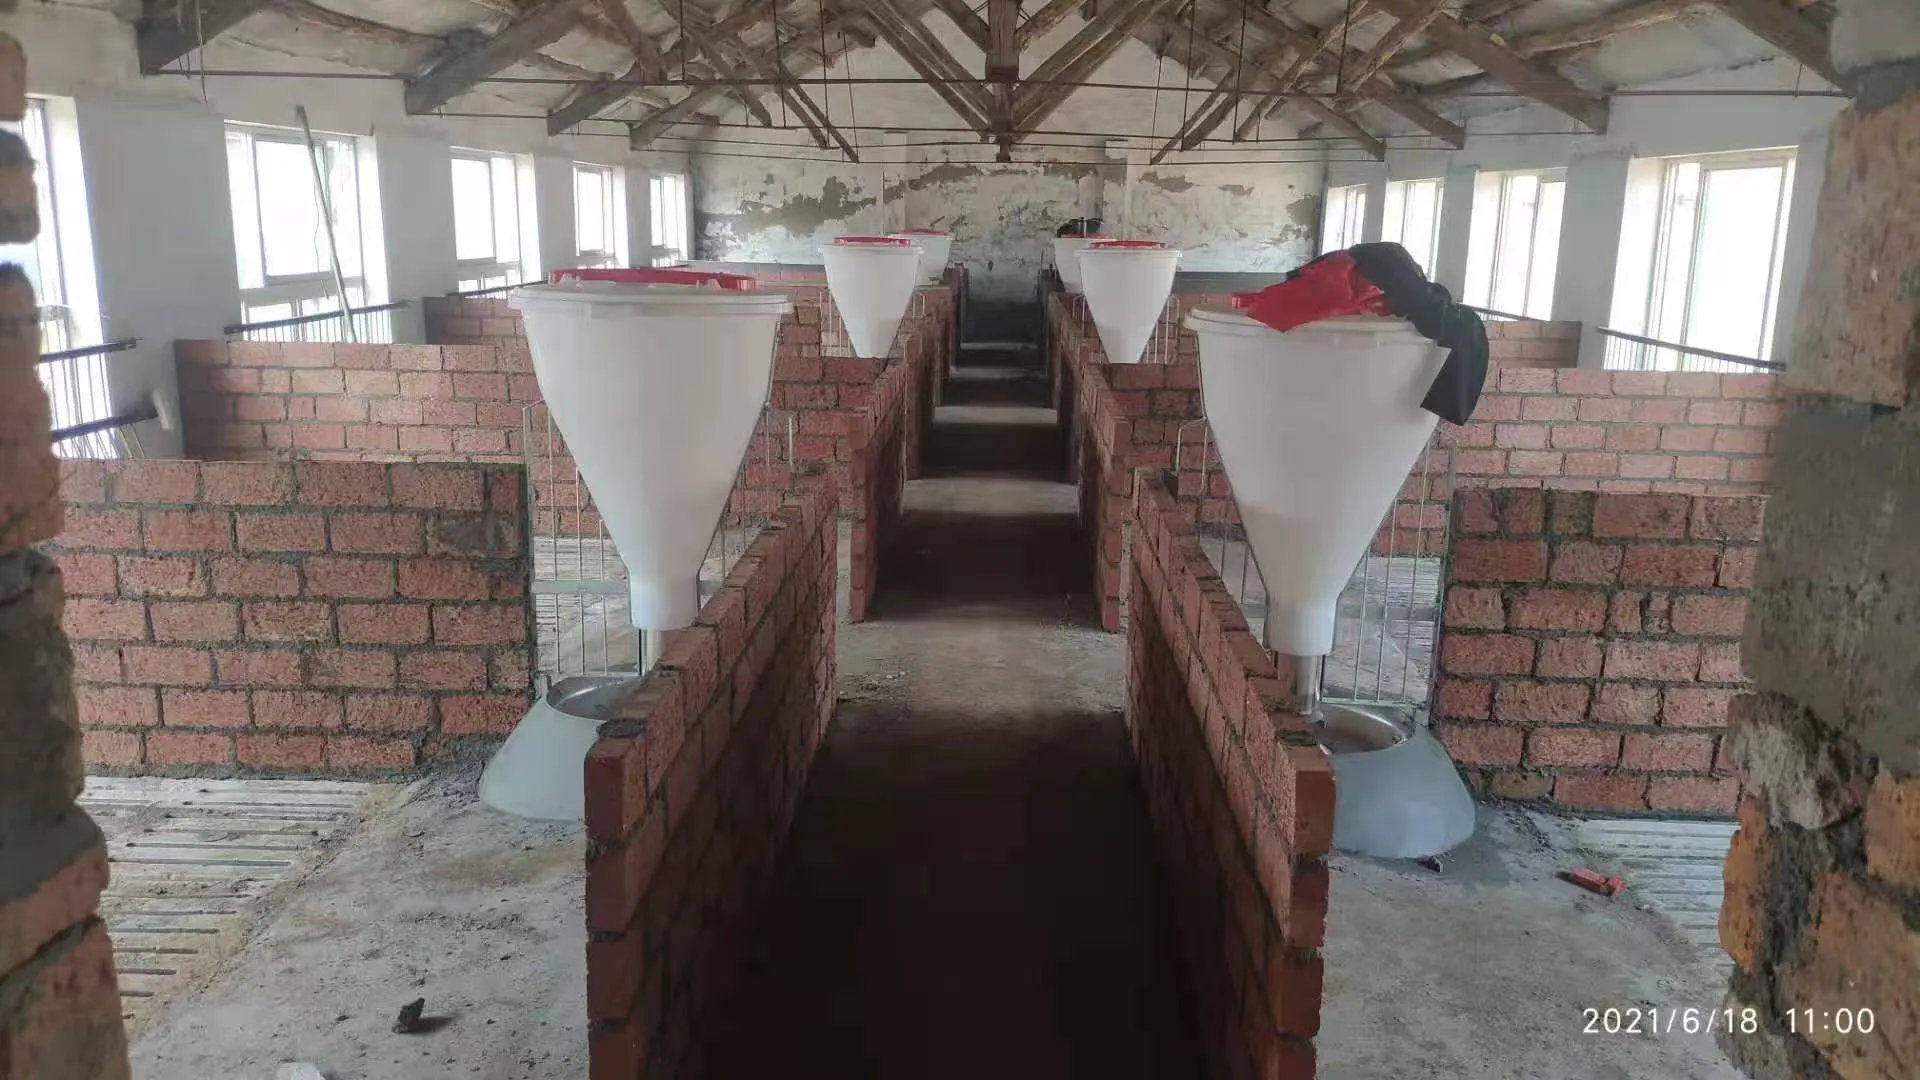
Por que o piso, não apenas o ar
Os leitões deitam-se no piso, por isso a temperatura do piso importa mais do que a temperatura do ar. Uma área de creep quente permite à ninhada espalhar-se em vez de se empilhar, o que reduz o risco de esmagamento e mantém cada leitão uniforme. Em termos simples: o piso é onde a sobrevivência e o crescimento dos leitões são ganhos ou perdidos nos primeiros dias.
Uma manta aquecedora sob a cama do creep entrega esse calor mesmo onde os leitões se deitam, sem lâmpada de calor sobrecabeça com que se preocupar e sem pontos frios desiguais.
Temperatura do creep, semana a semana
Um piso aquecido não é uma superfície “sempre quente” de definir e esquecer; é um alvo que muda à medida que a ninhada cresce. O programa prático parece-se com isto:
| Fase | Superfície alvo do creep | Por que muda |
|---|---|---|
| Primeiros 3 dias | ~30–34 °C | Os recém-nascidos perdem calor mais rapidamente aqui; superfície quente impede o encolhimento e esmagamento |
| Dias 4–10 | ~28–30 °C | Os leitões ganham algum isolamento; reduza gradualmente, não em degraus |
| Semana 2 em diante | ~26–28 °C | A ninhada é mais robusta; o piso reduz à medida que os animais o fazem |
| Antes do desmame | ~24–26 °C | Arrefeça o creep para facilitar a transição para o piso de crescimento |
Um termóstato por cubículo torna isto numa programação em vez de uma decisão de julgamento. Define o valor elevado inicial, reduz à medida que a ninhada amadurece, e arrefece o creep antes do desmame — tudo sem voltar a aplicar nada. Essa é a razão prática para dar a cada cubículo o seu próprio controlo em vez de uma temperatura para todo o pavilhão, e por que a escolha do controlador importa tanto quanto a própria manta.
Encaixar o aquecimento no layout do pavilhão
Aquecer o cubículo inteiro desperdiça energia; direcionar a área do creep dá aos leitões um ponto quente e deixa o resto do cubículo mais fresco.
Cada cubículo pode funcionar com a sua própria manta e termóstato, para que uma ninhada pronta para desmamar possa ser arrefecida enquanto uma nova ninhada se mantém quente.
As mantas ficam sob uma camada de piso robusta que sobrevive à lavagem, urina e à raspagem diária de um pavilhão real.
Sem peças móveis, nada para reabastecer — apenas um circuito limpo e um sensor, estação após estação.
Como a camada de aquecimento é construída
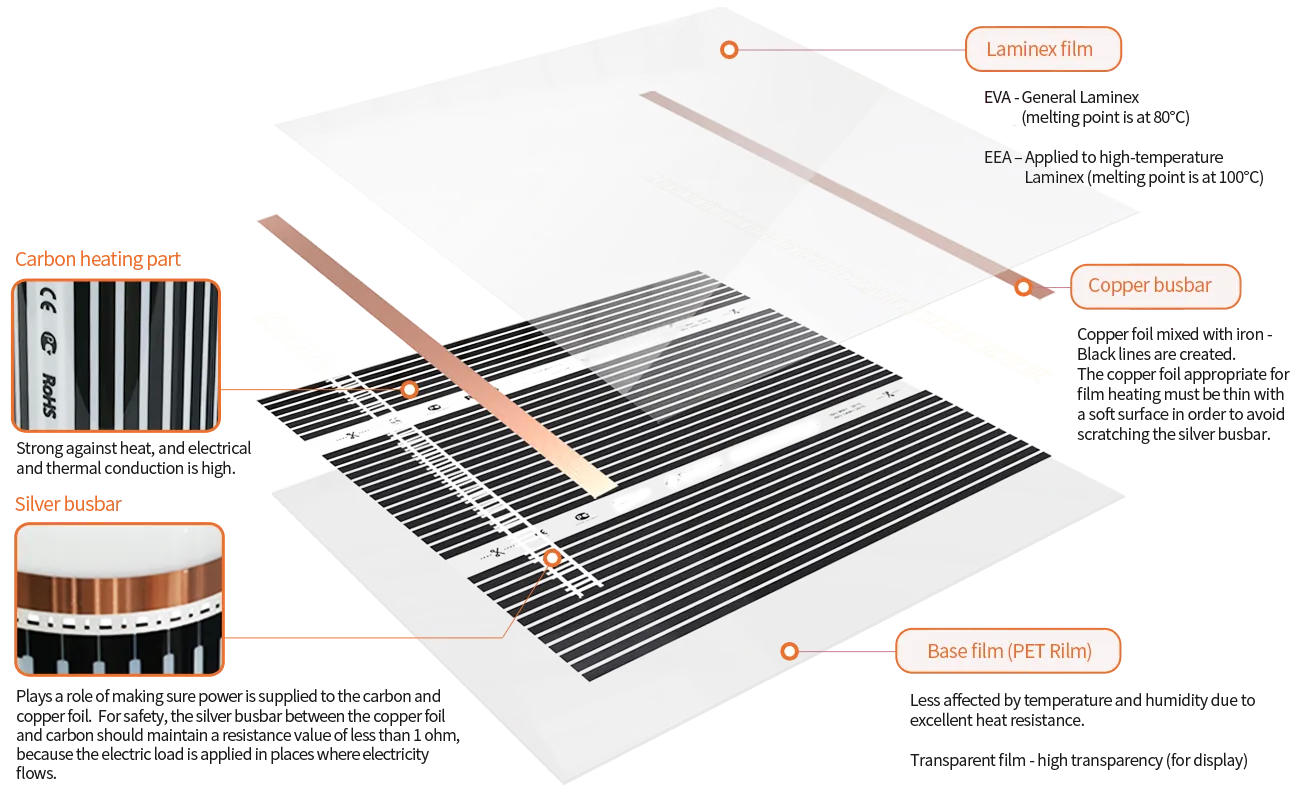
The same layered construction that heats a home floor is what makes a barn mat dependable: a carbon heating element laminated between strong films, fed along copper busbars. Because it is sealed and flat, it sits safely under the creep floor and tolerates the farm environment far better than a bare wire.
Sizing the creep mat for a pen
Sizing a barn mat is more honest than it sounds. Mark the creep zone in the pen, measure its floor area, and apply a wattage for a heated creep — usually around 150–200 W/m² under the creep cover, a little more where the barn is cold. A typical creep zone of 2 m² needs roughly 0.3–0.4 kW of mat, which is well within a small circuit and easy to run per pen. The real sizing work is electrical rather than thermal: add the mats each pen will carry, size that pen’s circuit and controller, and keep the barn’s total on a sensible diversity basis so the whole house does not pull peak current at once. For the products and ratings that fit this duty, the electric heating mat range is the starting point for livestock-rated options.
Heat lamp versus a warm floor
The honest comparison matters because heat lamps are common and cheap to buy. A lamp warms from above, needs clear mounting space, must be kept clear of bedding and litter, and heats the air around it as much as the piglet lying below. A floor mat heats the surface the piglets actually lie on, spreads warmth across the whole creep, has no overhead element to guard, and keeps working if a lamp is out of stock or a bulb fails in winter. For litter survival and even growth, the floor is the dependable option; the lamp is a useful backup, not a substitute for a warm surface — and it cannot be managed by the same per-pen thermostat that steps the floor down as the litter grows.
What makes a barn mat dependable
Not every heating mat is a barn mat, and the difference is worth naming so the right product gets buried under the creep. A livestock mat is built to run for long, constant duty rather than short comfort cycles, and it is rated for the moisture, cleaning chemicals and physical wear of a working farm. The heating element is laminated between strong films and fed along busbars, in the same family of construction that heats a home floor — but the jacket and the duty rating are what make it agricultural. Choosing a mat with the CE and RoHS marks verified matters on a farm precisely because a failure is not a comfort issue; it is a production problem mid-winter. In practice that means selecting the mat for the pen’s duty, protecting its terminations against the environment, and matching the controller to the load — three choices that cost little up front and save a whole bad season later.
Reading the temperature correctly
The floor sensor in a pen does the same job it does indoors, but the barn adds noise. It should sit in the creep area, between two mats rather than on one, and away from the sow’s water and the feed line so a wet patch or a blocked nipple does not trick it. Because the barn is washed down, the sensor should run to the controller in a protected channel, not loose across the floor where a blade or a hoof can reach it. And the reading should be checked each season against a hand thermometer — the sensor is only as good as where it lies, and a nicked or buried sensor is the classic “the floor is warm but the controller thinks it is cold” complaint to plan against.
Installing it in a pen
Size the creep area
Mark the creep zone in each pen and measure it — that area sets the mat wattage you need.
Bed the heating layer
Lay the mat on a level, dry base in the creep zone, keeping it flat and clear of pen edges.
Cover and protect
Run the mat beneath a durable floor layer so pigs cannot reach the heating surface directly.
Wire and control
Connect each mat to a thermostat rated for the load, with the sensor placed in the creep area for an accurate floor reading.
Commission and watch
Test the circuit, set the creep temperature, and check the first litter settles spread out on the warm spot.
Routine checks that keep a barn system alive
- Check the floor sensor reading each season against a hand thermometer.
- Keep the heating circuit on its own residual current device, and test it regularly.
- Wash down with the floor system isolated and fully dry before powering on again.
- Re-check mat edges after heavy scraping to be sure no cover has worn through.
Barn electricals: the parts that fail
Farm heating fails on the wiring long before it fails on the element, so the electrical habits matter more than any single mat. Every mat circuit should run through its own residual current device, and the test button should be pressed on a schedule, not left to a fault to discover. Sensor runs and mat supply runs should sit in protected channels so washdown water and a scraping blade cannot reach them. Connections belong in a dry, labelled box away from the pens, not tucked under bedding where moisture and ammonia attack the joints. And because a barn is dusty and washed down hard, the controller and any junction boxes should be sealed against the environment. These are the small choices that turn a mat that “should last” into one that actually does, season after season.
Lessons the barn installs reinforce
A few notes carry across every farm job we work on. Size the creep generously — a slightly larger warm zone stops the litter packing into one corner and spreading heat unevenly. Plan the wiring when the pens are empty, because it is far easier to run protected channels before the animals are in than to retrofit around them. Write the wattage and sensor position for each pen on a small tag at the controller, so a new stockman or a visiting electrician can see at a glance what each circuit serves. And when in doubt about duty, choose the mat rated for constant running rather than the cheapest option — on a farm, the cost of one failed week in winter dwarfs any saving on the initial mat. The same discipline applies to the controller: a thermostat rated for the pen’s load, with a sensor in the creep, turns a good mat into a reliable system rather than just another appliance. Those are the habits that turn a barn floor into a decade of dependable service.
Barn heating questions
What temperature should the creep floor run at?
Should I heat the whole pen or just the creep?
Is an indoor film the same as a barn mat?
How long do these floors last?
Can I set different temperatures for different pens?
Will washdown water damage the mat?
Is this worth it for a small barn?
Tell us the pen sizes and target temperature and we will recommend a mat layout and thermostats for the barn.
Farm electrical work must be carried out by a qualified installer to local and agricultural safety codes. The barn photograph is site documentation; product brands visible in images belong to the equipment shown.