
Graphene Heating Film for Home: A Field Retrofit Case
How a two-room home retrofit used nano graphene heating film to add warm floors without pulling up the slab.
The job was a two-room renovation in an occupied building: the owners wanted warm floors under laminate, but they did not want to dig up the slab, wait weeks for screed to cure, or add centimetres of height at doorways. That is a fairly common brief, and it is where a graphene heating film earns its place.
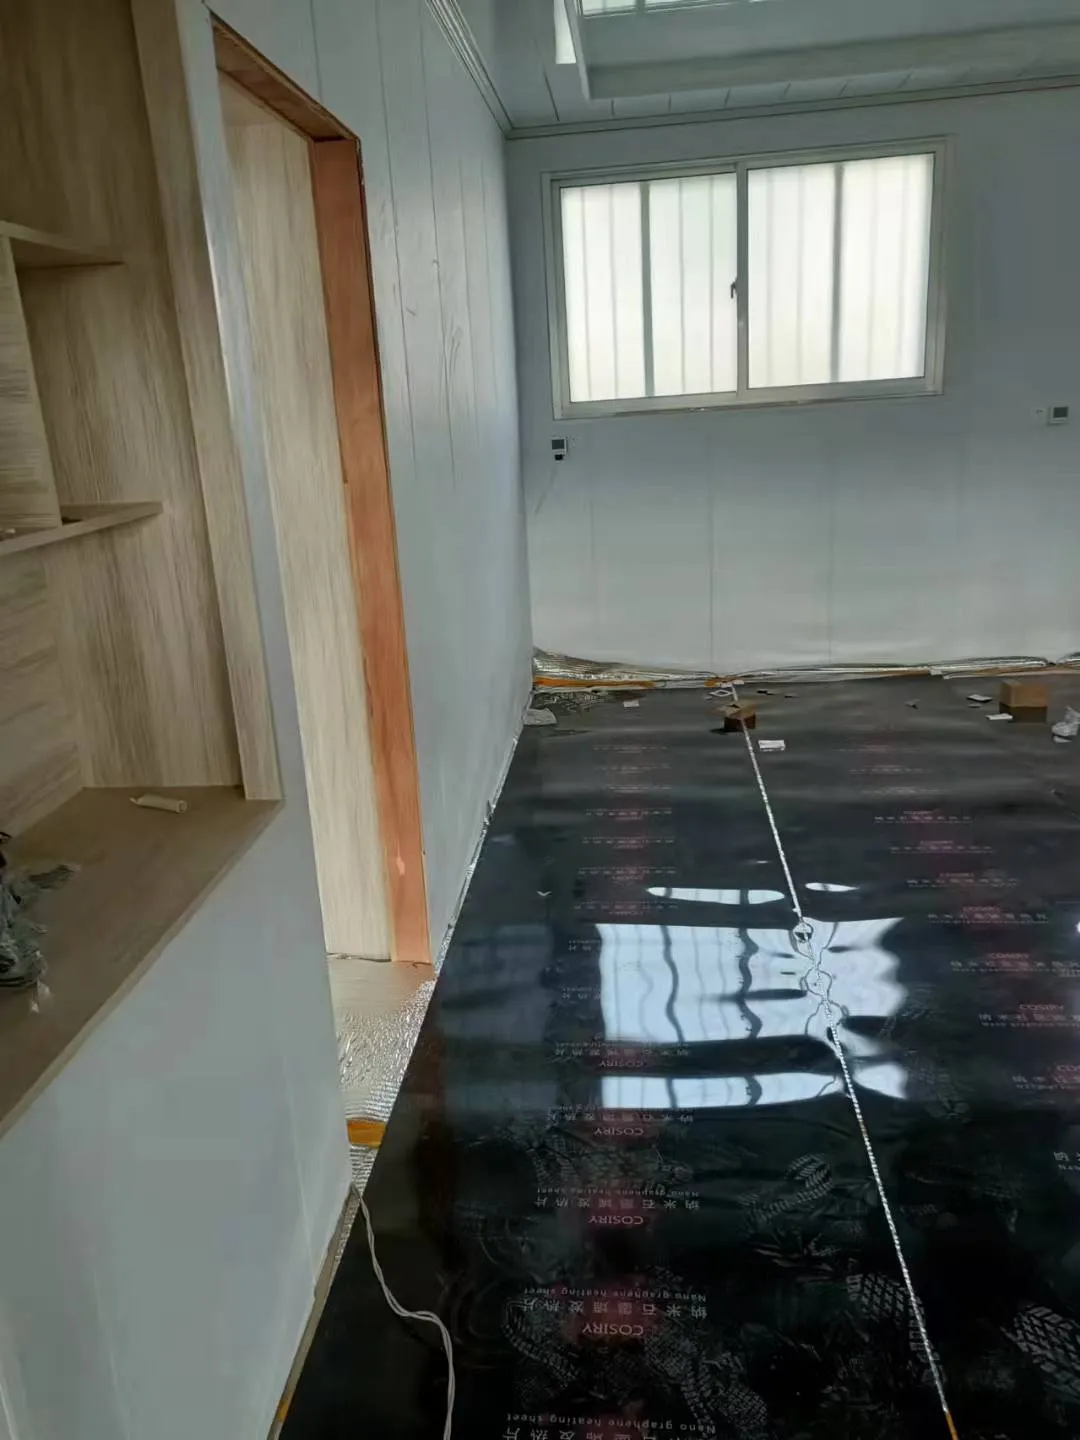
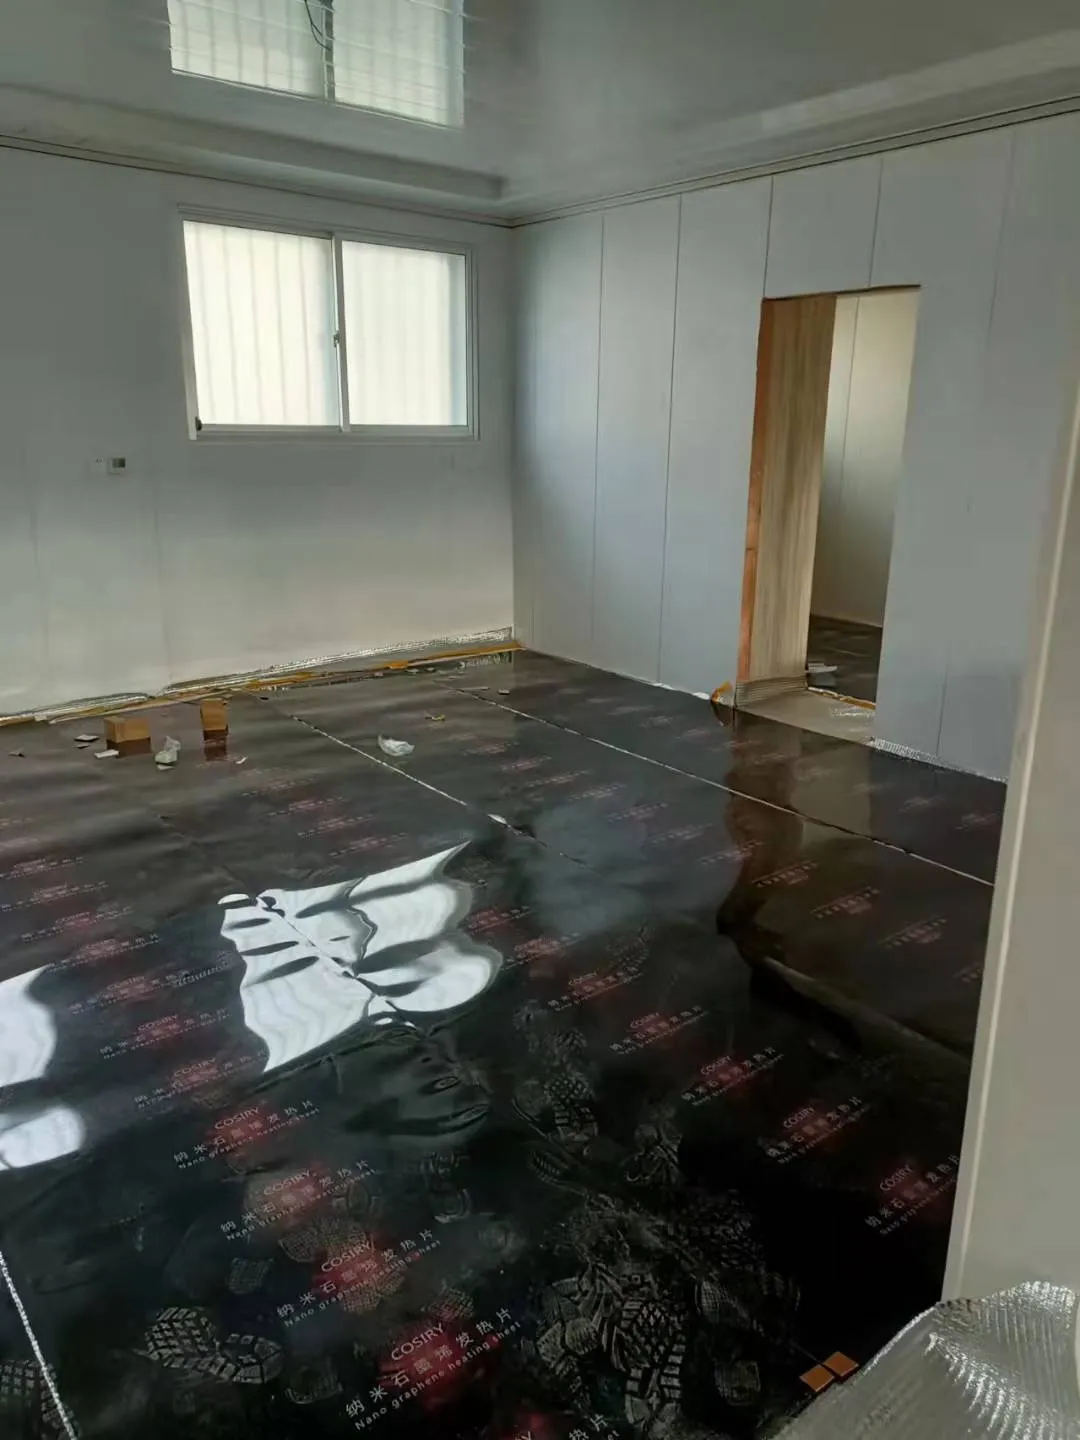
What the retrofit involved
Electric heating film is a thin laminated sheet — a carbon heating layer between a base film and a top lamination — so it lies flat on the existing subfloor. For this retrofit the sequence was: clean and level the old surface, unroll the film sheets to a tidy layout, join the copper busbars at the ends, bring the supply wires to a floor heating thermostat, then lay the laminate over the top. Because the whole heating layer is only a few millimetres thick, the finished floor height barely changes.
What we laid, room by room
| Room | Heated area | Surface | Film used |
|---|---|---|---|
| Living room | ~21 m² | Laminate over existing slab | Nano graphene heating film |
| Bedroom | ~12 m² | Laminate over existing slab | Nano graphene heating film |
| Kitchen | ~8 m² | Rigid floor tiles | Heating film with copper busbar joins |
| Bathroom | ~5 m² | Tile, water-risk area | Film + waterproofing membrane over top |
Note the bathroom: film can go under tile, but in a wet room we keep the heating layer below a proper waterproofing membrane and bond the laminate or tile over it. That is the kind of detail that matters more than wattage on paper.
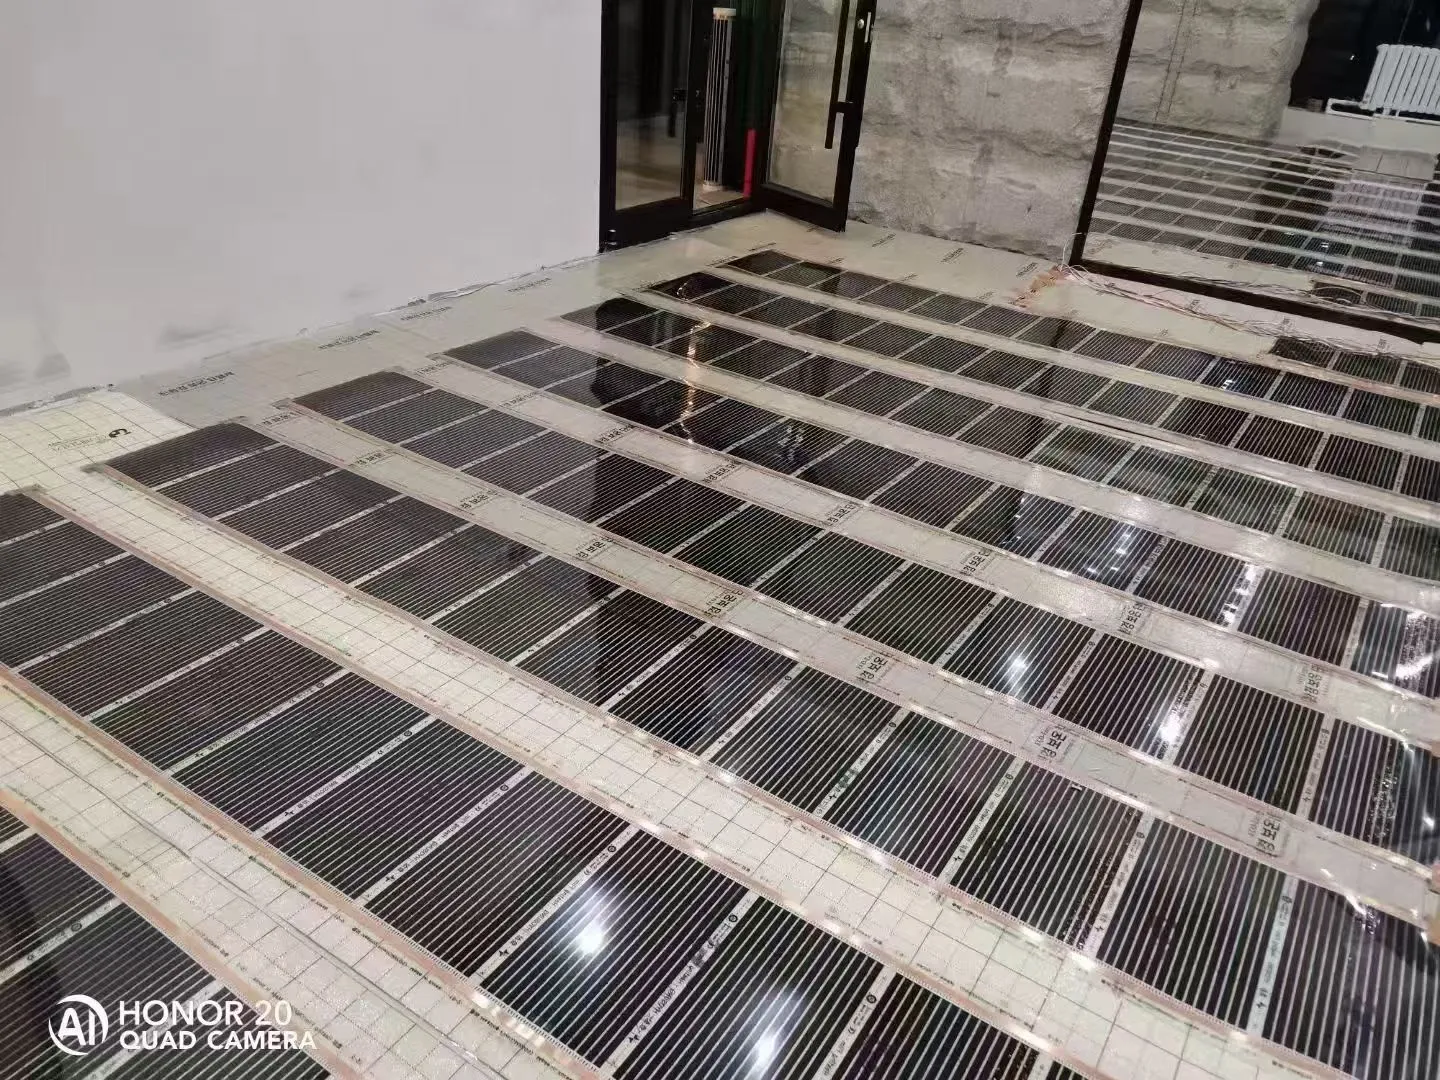
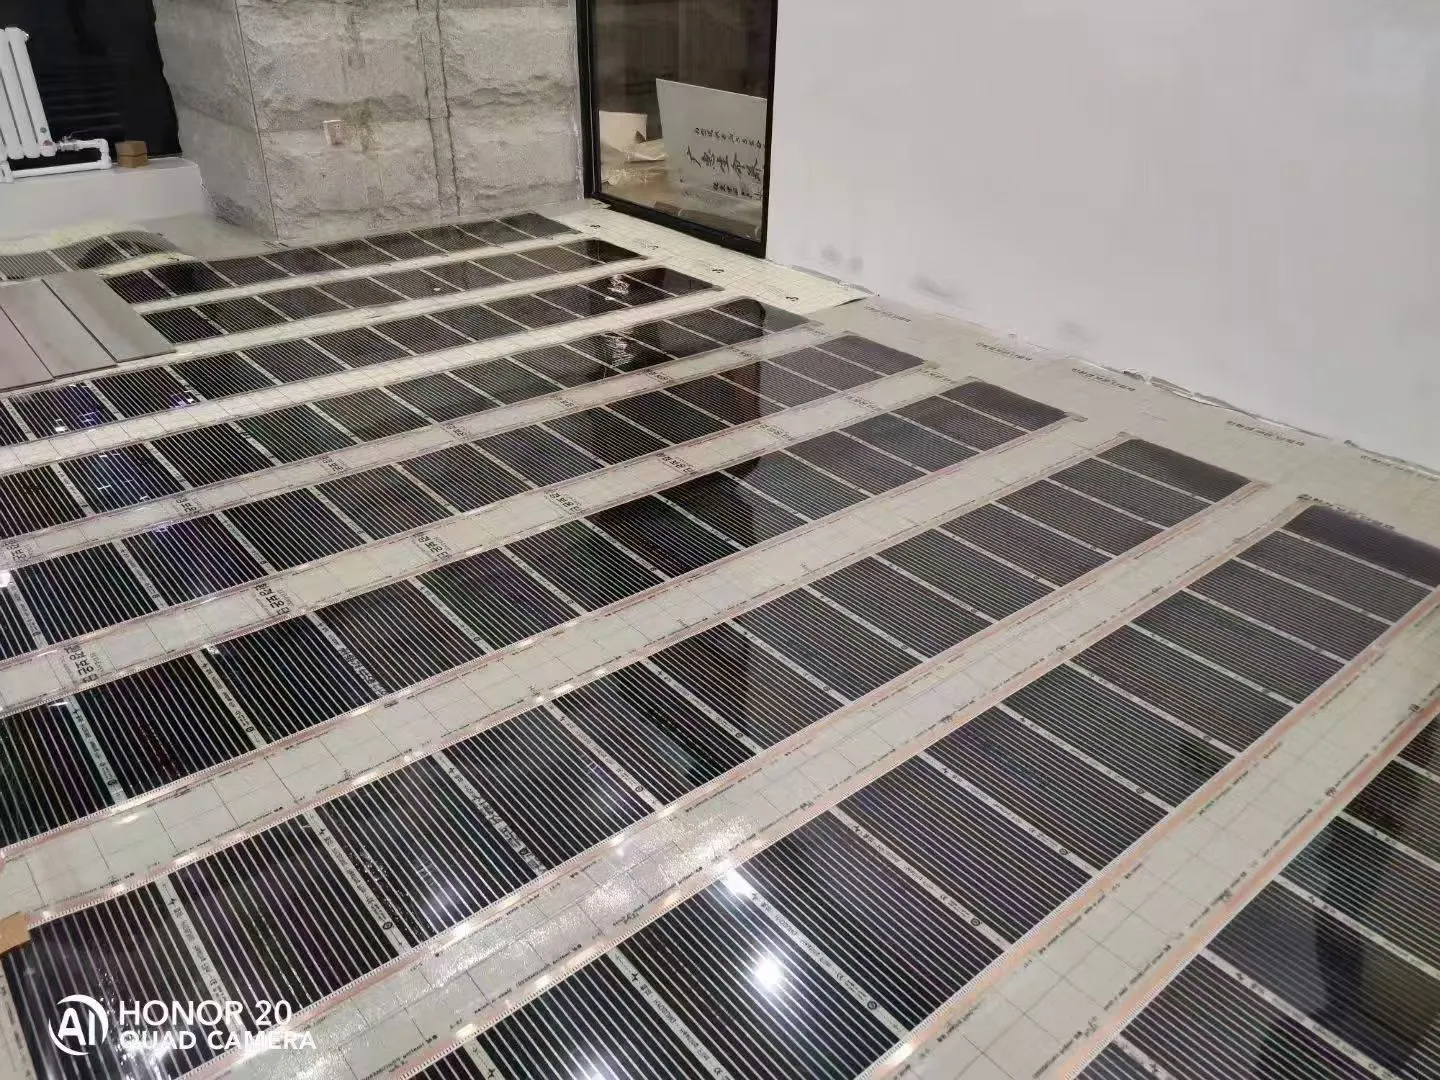
How the film was laid, step by step
Prep the floor
The old surface was swept and levelled; any high spots were ground down. Film needs a flat, dry base so the sheets lie flat and nothing presses through the laminate.
Plan the layout
Sheets were laid dry first, keeping a 1–3 cm gap between strips and at least 5 cm from walls and fixed furniture so heat spreads evenly and nothing overlaps.
Run the busbars
The copper busbar at the end of each sheet was connected to the supply wire, and each joint wrapped and taped. Correct busbar contact is where most on-site failures come from — get this clean.
Terminate at the thermostat
Supply and sensor wires were brought to the wall box and terminated at a programmable floor heating thermostat so each room heats to its own schedule.
Finish and test
Laminate went down over the film, then each circuit was tested for continuity and resistance before power-on. Two dry runs later the floor was commissioned at a comfortable 24–26 °C.
Why graphene film suits a retrofit
A graphene heating film radiates heat across its whole surface rather than along a single cable line, so a large floor area heats quickly and evenly. Under a thin finish like laminate this matters: there is no thick screed to store the heat, so you rely on a fast, even response — which is exactly what a distributed carbon film gives. Because it is thin and dry-laid, it is the lowest-impact way to add floor heating to a room you already live in.
Film versus cable at a glance
| Graphene heating film | Heating cable / mat | |
|---|---|---|
| Install height | ~1–2 mm, dry-laid | Bedded in adhesive or screed |
| Best under | Laminate, vinyl, engineered wood | Tile, stone, screeded floors |
| Warm-up | Fast, even surface heat | Slightly slower, stores heat in the mass |
| Retrofit friendly | Yes — no concrete pour | Usually needs a fresh bed |
Sizing the film, room by room
The table above lists what we laid, but the useful part is how the wattage fell out of the room sizes. Graphene heating film is sold by watts per square metre, so for a retrofit under laminate we start from a working figure and adjust for the room. In these two rooms the maths ran like this:
| Room | Heated area | Wattage basis | Connected film |
|---|---|---|---|
| Living room | ~21 m² | 150 W/m² under laminate | ≈ 3.2 kW |
| Bedroom | ~12 m² | 130 W/m², lower schedule | ≈ 1.6 kW |
| Kitchen | ~8 m² | 130 W/m² (cabinets deducted) | ≈ 1.0 kW |
| Bathroom | ~5 m² | 160 W/m² under tile | ≈ 0.8 kW |
The connected total is around 6.6 kW across the four rooms, but that is not the load the consumer unit sees. Each room runs on its own floor heating thermostat and its own schedule, so the rooms rarely draw full power at the same moment. That is the practical difference between “installed wattage” and “peak demand” — and it is why film heating in a house does not force an oversized supply.
Installation notes that keep a retrofit safe
- Never cut into the heating area of the film — only the plain busbar margin is cuttable.
- Keep heating sheets clear of fixed fittings, radiator pipes and heavy furniture feet.
- Always fit a residual current device on the circuit feeding the floor.
- Use a floor sensor plus air sensor so the room neither overheats nor under-heats when a door opens.
- Follow the sheet’s stated wattage per square metre when sizing the breaker.
What it costs to run in a real room
Owners always ask for a running-cost number, so here is the honest way to estimate one rather than a headline figure. A film floor converts almost all its electricity into heat, so the cost is close to the energy it uses: the room’s connected wattage multiplied by the hours it actually runs, divided by a thousand for kilowatt-hours, then multiplied by your local electricity rate. A 21 m² living room at 3.2 kW that runs for, say, six hours a day uses about 19 kWh on the days it runs — and because the floor is quick to respond and the thermostat only calls for heat when the room is below target, a well-scheduled wifi floor heating thermostat keeps those running hours honest. Compared with keeping a radiator or a boiler on all day, zoned electric film heating tends to use energy where and when it is wanted, which is why the bill often comes out lower than people fear.
Two things change the number more than anything else: insulation and scheduling. A draughty room leaks the heat the film makes, so the retrofit works far better after basic draught-sealing. And a floor that is left on a constant set-point all day costs noticeably more than one that warms up just before the household is home. Film’s fast response is exactly what makes that “warm it when you use it” pattern possible.
Common questions
Can film go under wood or laminate?
Does it raise the floor much?
Is one thermostat enough per room?
How is the wattage chosen?
Can I heat one room now and add another later?
Does the film need a special floor sensor?
Lessons this retrofit reinforced
Every install sharpens the next one, and this two-room job left a few notes we keep coming back to:
- Spend the time on the substrate. Film is forgiving, but a flat, dry, dust-free base is what stops a shadow of a high spot showing through a thin laminate finish.
- Measure the doorway height before promising anything. In most cases the couple of millimetres of film disappears under the floor; occasionally a threshold needs a trim, so it is worth checking early.
- Label the circuits as you wire them. When the laminate is down you cannot see which busbar feeds which room, and a tidy label saves the first service call.
- Tell the owner what the thermostat’s “away” and “frost” settings do. A floor you can leave at a low frost setting while on holiday uses almost nothing and protects the room.
- Dry-run the whole layout before taping anything down. Film is easy to shift while unlaid, and re-planning a layout after the busbars are taped is the kind of rework that never shows up on paper.
Under the right floor finish and with a clean layout, this is a system an owner forgets about — which is the best review a heating install can get. For the full family of film, mats and controls used across these cases, the underfloor heating range is where the product choices start.
How the heat feels in daily use
The reason people choose this over a radiator is not the energy maths alone — it is the character of the heat. A radiator heats the air near it and leaves the far corner of the room cool; a film floor warms the whole surface you walk on, and because the room is heated from the floor up the heat spreads more evenly at the level where you actually sit and stand. On a tiled or laminate surface the floor reads pleasantly warm to the bare foot within twenty minutes or so of switching on, which is fast enough to run the room on a schedule rather than leaving it on standby all day. There is no hot element to dust, no wall-mounted unit fighting for space, and no draught strip under a window trying to lose the heat it just made. For owners who spend long hours in one room — a home office, a kitchen, a child’s bedroom — that even, floor-up warmth is usually the deciding factor, and it is the side of the system that photographs never quite capture.
It also matters how the film sits in the room over time. Because it is dry-laid and reversible, a later change — lifting a laminate board to reach a joint, adding a zone, or moving a thermostat — is a small job rather than a demolition. That reversibility, more than the millimetres it saves, is what makes electric film the sensible retrofit choice for a room the owners intend to keep living in.
Send the room sizes, floor finish and whether it is a retrofit — we will suggest a film or mat layout and a quantity list.
Field photographs show the installation technique used on site; brands visible on material in the images belong to the equipment shown and appear only as on-site references. Wiring should always be carried out by a qualified electrician to local code.