
When a renovation contractor or a property owner calls us about retrofit wall heating, the first question is almost never “what panel do I buy.” It is “can I do this without lifting the floor, without chasing channels in the plaster, and without disturbing the tenant who is still sleeping in the spare room.” That is the question this guide answers. We are not going to repeat the SKU-by-SKU wattage table or the RFQ checklist that we already published in our buying guide for the graphene wall heating film. What we will do here is the room-by-room and building-by-building decision work: which wall, which power density, which control strategy, and which trade-off you accept when you cannot rip the whole interior out. Written by Robert Chen, Applications Engineer, SunAura Thermal.
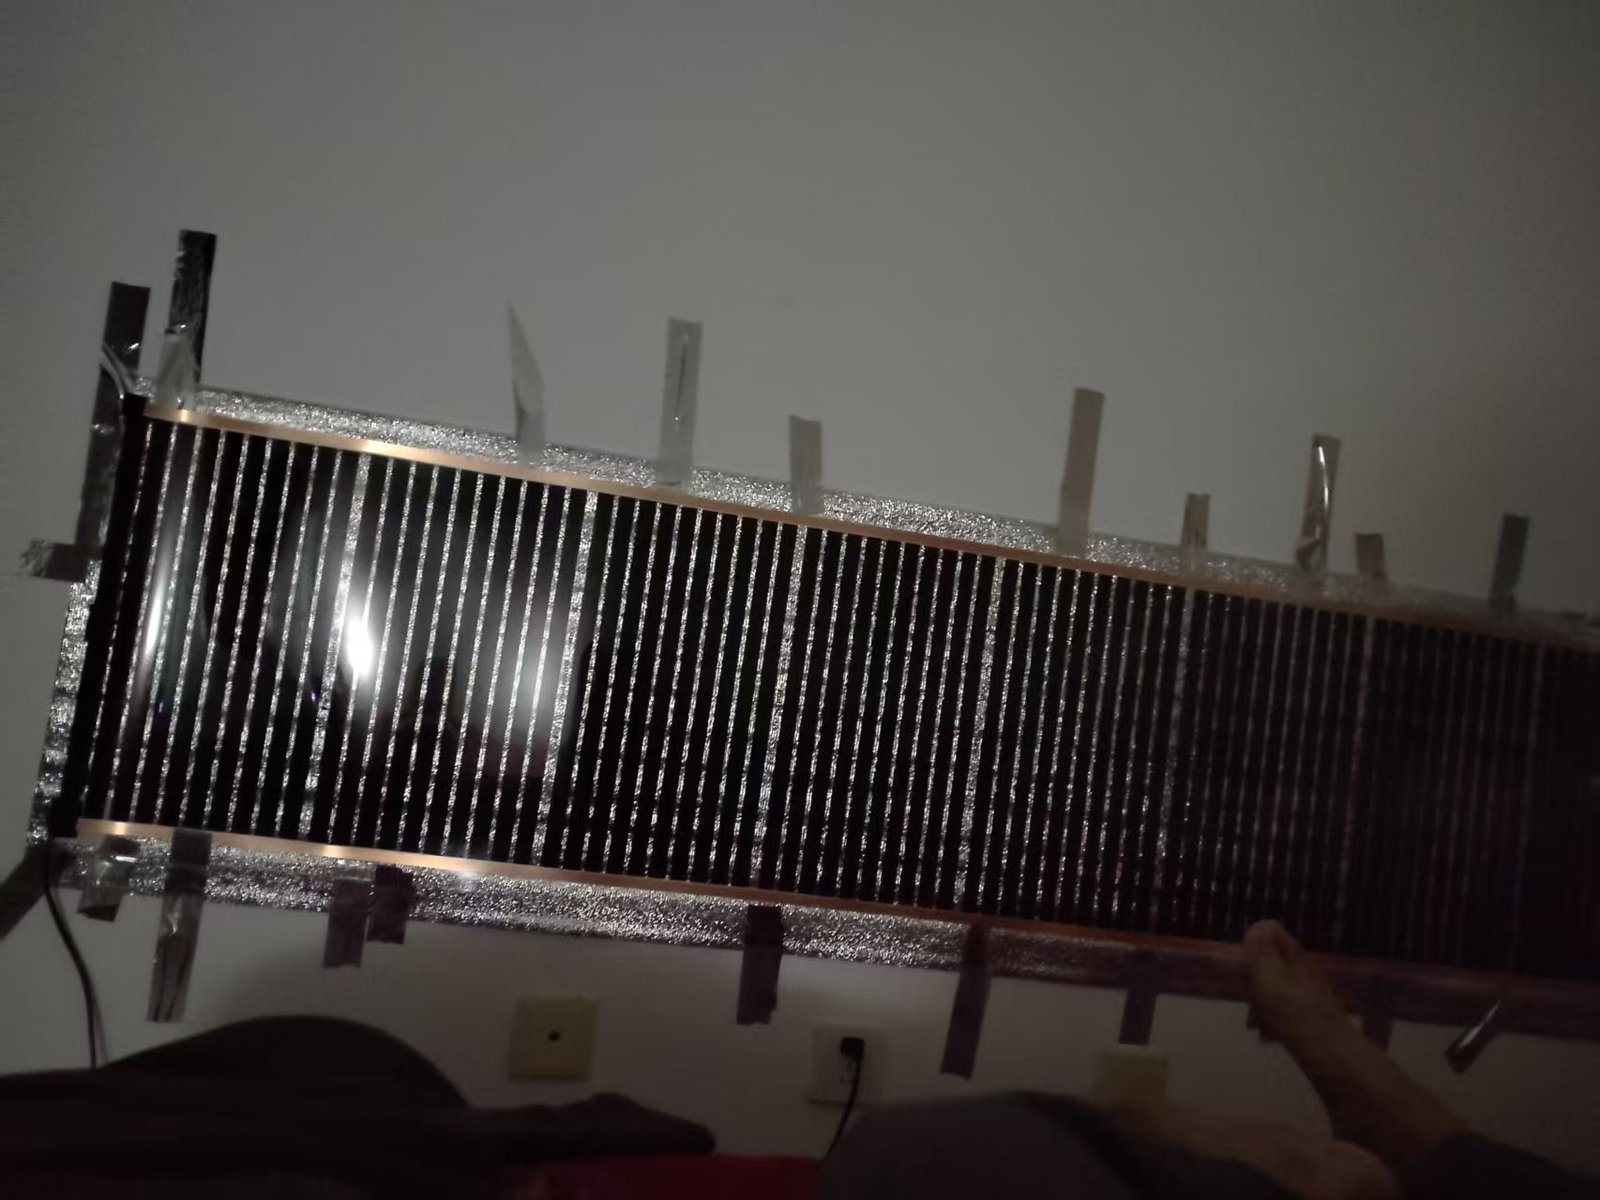
Why Retrofit Changes the Spec
In a new-build project, you design heating from a blank wall. You can run conduits, lay underfloor pipe, chase a niche for a radiator, and you size the whole envelope as one thermal problem. A retrofit is the opposite. The wall is already there, the floor finish is already down, the tenant has a lease, and the budget line for “heating upgrade” is a fraction of what a ground-up build would cost. Underfloor heating retrofits in particular mean pulling up floorboards, screeding a new layer, waiting days for the screed to dry, and then redecorating on top. That is a multi-week wet-trades project, not a weekend job.
Our XGF-WALLFILM is sized for exactly this constraint. It is an ultra-thin printed graphene-carbon resistive film that sticks to an existing interior wall, with a silver reflective backing that pushes radiated energy back into the room instead of into the wall structure. There is no wet screed, no channel chasing, no floor removal, and no large cabinet. A standard room can be finished in a few hours. Electric-to-thermal conversion is above 99 %, the surface reaches working temperature in roughly one minute, and because the element is a flat film rather than a fan-driven unit, it runs silent and does not circulate dust. That combination is what makes it a credible retrofit product rather than a supplemental holiday heater.
The spec that changes between a new build and a retrofit is not the film itself. It is the decision frame. In a new build you choose a primary heating system. In a retrofit you are usually choosing between top-up heat, zone comfort, and targeted cold-spot elimination. The seven sections below walk through the scenarios where that distinction matters most.
Seven Retrofit Scenarios
Every retrofit project we see lands in one or more of these seven rooms or building types. For each one we give you the reason the film fits, the wall it should go on, the power-density logic we use, and how we run the thermostat. We are deliberately not listing a SKU per room here; that is the job of the calculator and the RFQ. What we give you is the decision pattern.
Apartment and Rental Flat Retrofits
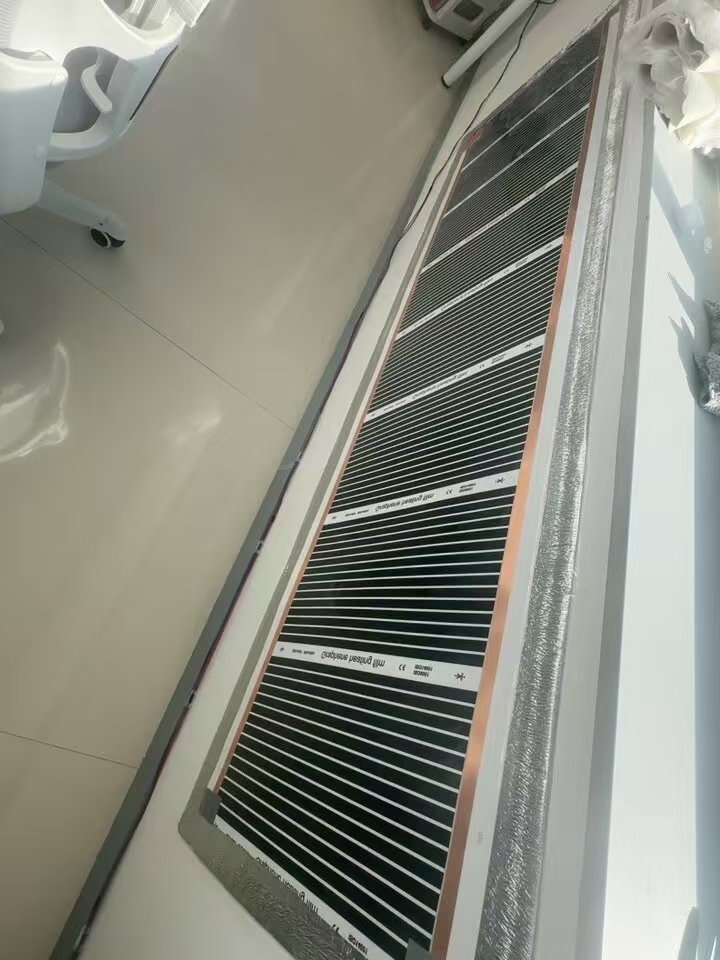
The dominant constraint in an apartment or a rental flat is reversibility. A landlord does not want to run gas lines, pour screed, or mount a cast-iron radiator on a listed tenement wall. A tenant does not want to sign a lease for a flat that has been structurally modified for someone else’s heating. The thin wall heating panel for retrofit solves both sides of that argument. The film sticks to drywall, plaster, wallpaper or tile with adhesive and positioning tape, and the factory-printed fixing-hole strips on the silver foil border allow screw fixing only where the silver foil is, never through a heating stripe. If the tenancy ends, the film comes off, the wall is repainted, and the deposit dispute never happens.
Typical placement is the wall behind the headboard in the bedroom, the wall under the main window in the living room, and a smaller panel behind the dining or work surface. Power-wise, a rented flat in a mid-climate region usually wants auxiliary configuration rather than primary: the existing central heating stays on, and the film takes the edge off the cold wall and the cold window. We size one panel per occupied zone, not one panel per room, and we run each panel on its own in-line thermostat. The High / Low / Off cord gives the tenant a three-position control they actually understand; you are not asking them to program a seven-day schedule they will ignore by week two.
One note for the landlord: because the film is wall-mounted and has zero floor footprint, it does not interfere with a sofa placement, a bed frame, or a built-in wardrobe. That is a sales argument in viewings. A radiator takes wall space and forces furniture off the wall; a film lets the tenant keep the layout they walked in with.
Heritage and Older Buildings
Heritage retrofit is where the physics argument and the conservation argument line up. You cannot cut channels in a listed Georgian plaster wall, you cannot lift a Victorian floorboard without a structural survey, and you cannot retrofit a wet underfloor screed into a room whose ceiling below is a decorated cornice. What you can do is put a 0.5 mm-thick film on the surface of the wall that already exists, held by adhesive on a flat plaster run and screwed through the printed foil border where the wall texture needs a firmer grip.
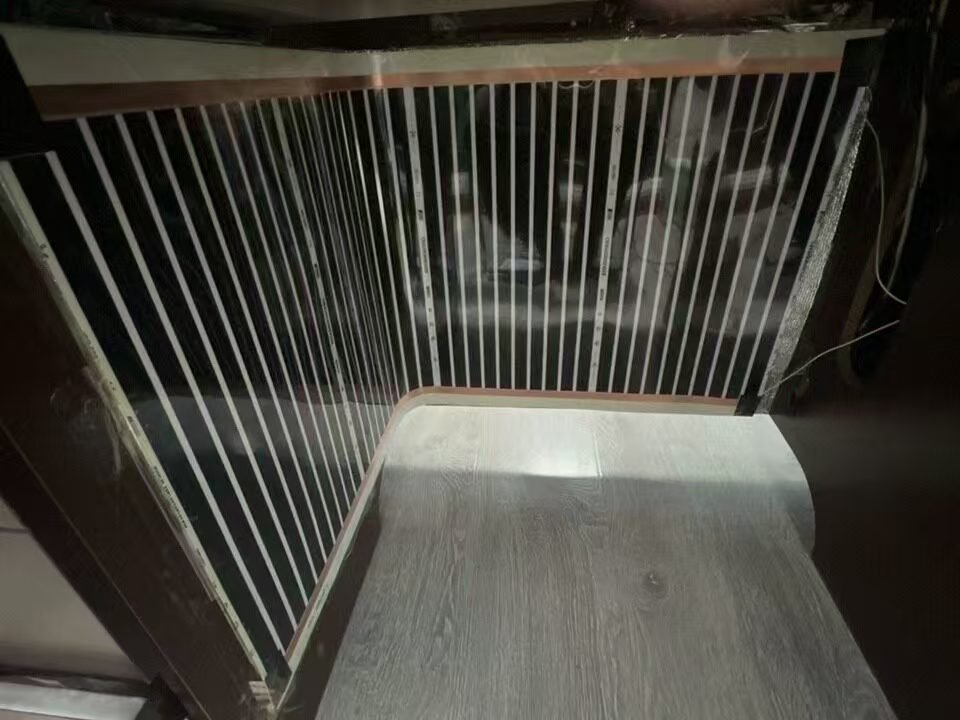
The flexible sheet follows an inside corner, follows a slightly uneven plaster run, and does not require a perfectly flat substrate. That matters in old houses where the plaster is never perfectly flat, and where a rigid panel would either rattle or need backing boards that themselves change the wall finish. We never screw through a heating stripe; the screws go only on the silver foil border strips the factory prints. A conservator can inspect the wall afterwards and see that the film is removable and that the structural fabric is untouched.
Power density on a heritage wall is conservative. Old walls are usually uninsulated on the cavity side, and a 500 W/m² film radiating against an uninsulated mass will lose a fraction of its output into the wall. We compensate two ways: we use the silver backing to reflect what we can, and we size the film for auxiliary rather than primary output in the first winter. After the wall warms up, the room responds faster. We also run the film on Low through a mild winter rather than High through a cold snap, because a wall that cycles between hot and cold in an old house will move moisture in ways the plaster has not been designed for. A steady, gentle background is kinder to the fabric than a thermal shock.
Short-Term Lets and Holiday Homes
A holiday let has three operating requirements that no primary heating system ever quite solves: fast warm-up between turnovers, low maintenance between guests, and a control interface that a stranger can operate at 11 pm after a long drive. Our film is unusual in all three. Surface temperature comes up in about one minute, which means a host can pre-warm the bedroom on a 30-minute notice before arrival without running a gas boiler for two hours. There is no filter to clean, no fan bearing to wear, and no thermostat program that a guest can scramble beyond a High / Low / Off cord.
The placement strategy in a holiday let is targeted rather than uniform. We warm the wall behind the headboard, the wall under the window the guest will look out at breakfast, and the wall behind the dining table where a family sits. We leave the hallway and the spare storage room alone, because the guest will not spend time there and every panel you leave on empty space is a kilowatt-hour of refundable deposit. Multi-panel projects in a holiday home usually pair with a SunAura room thermostat for scheduled zones, so the host can set the bedroom to a low overnight setpoint and the dining wall to a 30-minute pre-dinner boost without being on site.
Maintenance-wise, the fully shielded construction has no electromagnetic emission, which is the question every second host asks when they have a guest with a child or an infant. The film runs silent, so it will not wake a light sleeper, and it does not move air, so it will not blow dust off a bookshelf a guest has just dusted. Those are small points, but they are exactly the points that turn a 4.5-star review into a 5-star review in a short-stay channel.
High Ceilings and Loft Conversions
A loft conversion or a double-height room is the single most common retrofit problem we are called to solve with wall film. Convection heating in a high-ceiling room does the worst possible thing: it warms the air, the air rises, and half of the heat pools at the ceiling where nobody sits. Radiant wall heating behaves the opposite way. It warms the wall mass, the furniture, and the people in the occupied band between roughly 0.5 m and 2.0 m above the floor, and the air temperature in the room can be several degrees lower than a convection-heated equivalent and still feel comfortable.
Placement in a loft conversion is the knee wall or the sloping wall below the window. We run a vertical strip of film along the wall a guest will sit against, often behind a low sofa or a desk under the eaves. We avoid placing it on the gable end that faces the prevailing wind unless the wall is insulated, because the radiative loss into a cold outer wall is the one thing that will eat your output. Power density stays at 500 W/m² because that is the rated density of the film; what changes is the area. In a 4 m-high sloped room, we typically run more linear metres of film lower down the wall rather than a small, hot panel. Surface temperature of an uncovered panel is around 60 °C and a bit higher in demo footage, which is warm enough to feel at standing distance without being hot enough to touch-cook.
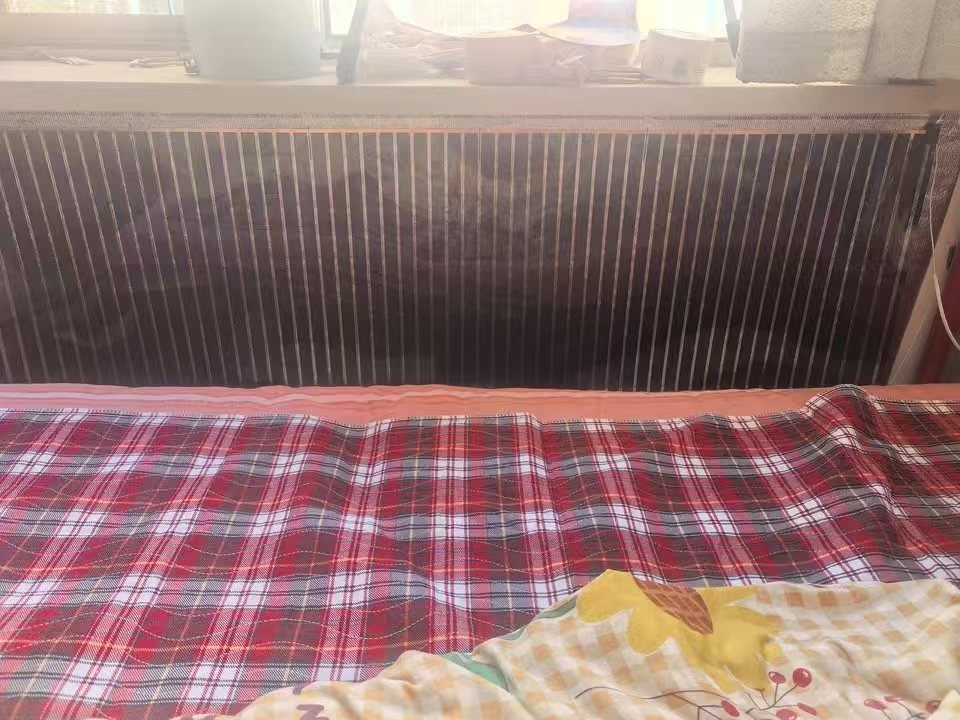
The cold downdraft under a window in a loft room is the second reason to put film on the wall beneath it. A convection radiator under the window fights the downdraft with a plume of hot air; a wall film under the window warms the cold air as it slides down and the wall itself, so the guest standing at the window does not feel a stream of cold air on their ankles. This is one of the highest-leverage placements in any retrofit, and we put it on the checklist below.
Bathrooms and Wet-Area Walls
Wall heating film in a bathroom is one of the most asked-about retrofits and the one most often done wrong. The film is rated for interior wall installation on ceramic tile, marble and plaster, and our own reference images show a run above the toilet on a marble tile wall. The rule is internal wall and non-flush zone: the film goes on a tiled or marble wall above the toilet or beside the vanity, where it warms the room and dries the wall surface between showers. It does not go inside a shower enclosure, it does not sit below a splash zone, and it does not replace the IP-rated bathroom heater or the towel rail that a building code may require.
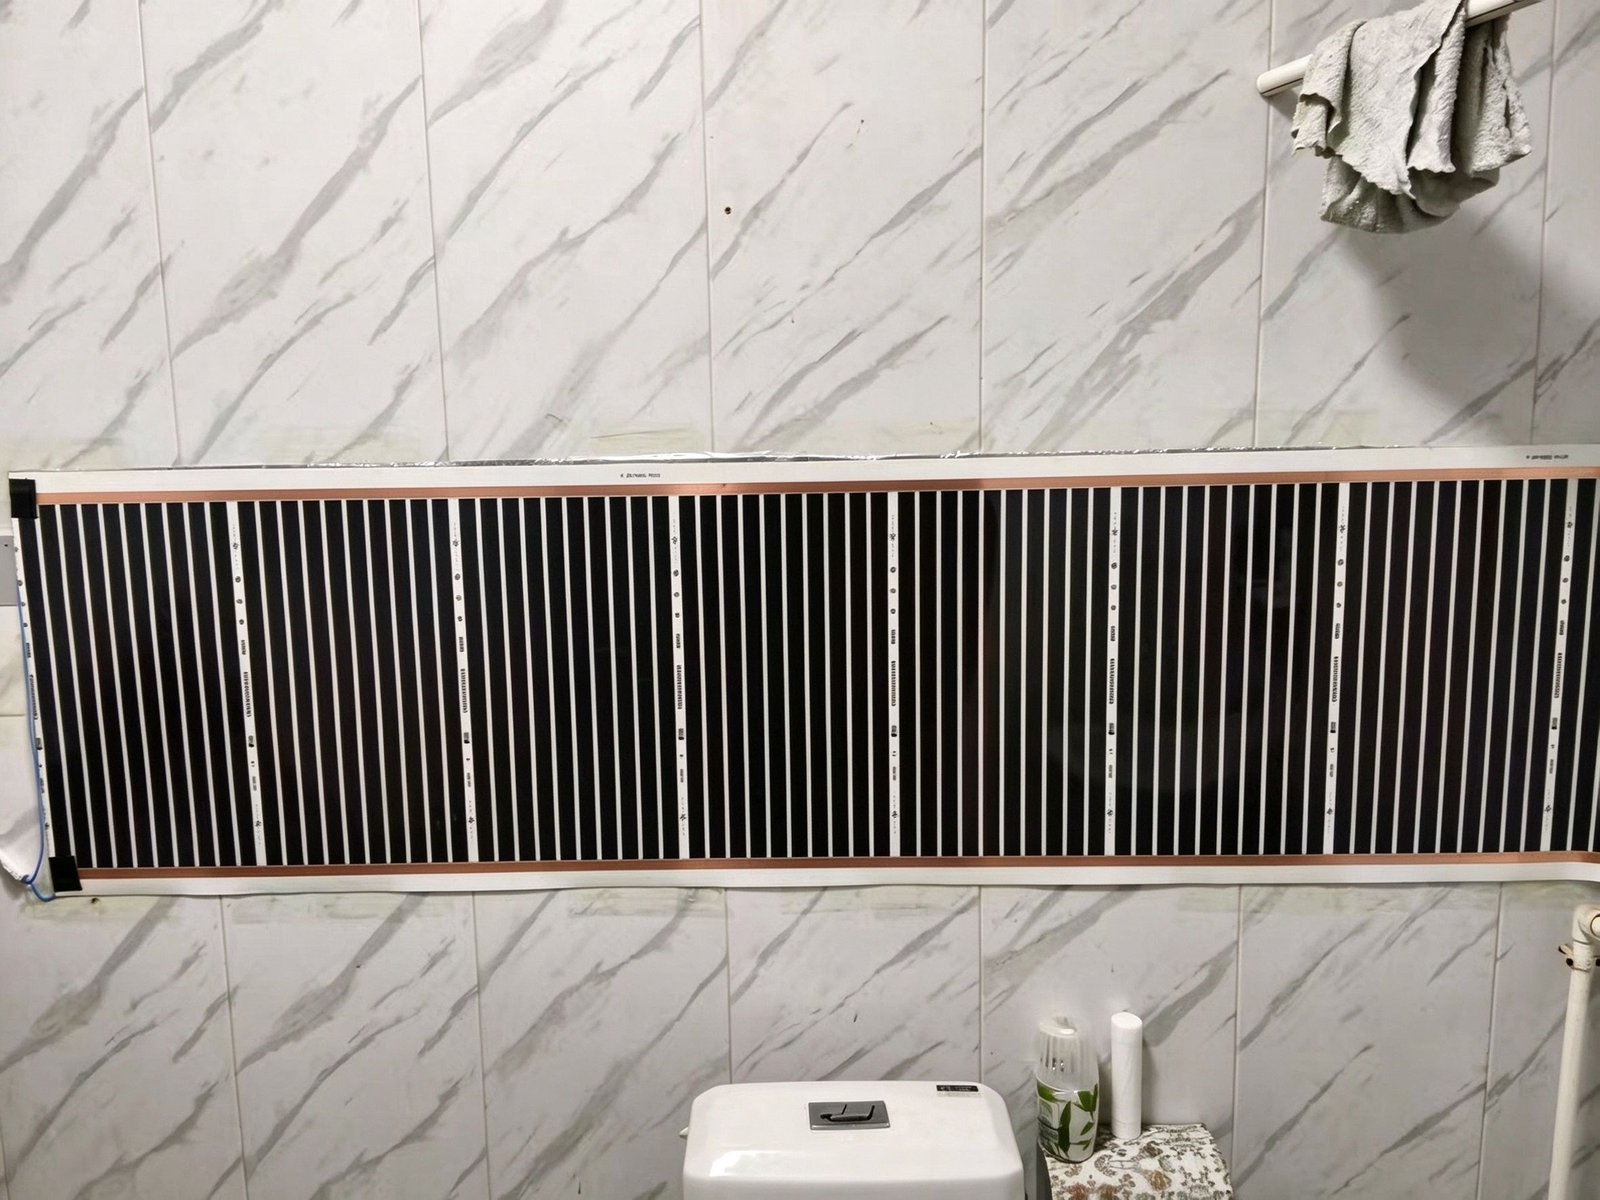
The reasoning for the bathroom retrofit is comfort, not drying. A tiled wall feels cold to the touch the moment you step out of the shower. A film on that wall warms the wall mass, so the bathroom reaches a tolerable temperature for the two minutes you spend drying and dressing. Power-wise we size a single 50×100 cm or 50×150 cm panel, run on Low, on a timer that turns off after the room has been used. The plug-and-play thermostat is fine here because the bathroom circuit in a retrofit house is usually already on its own RCD, and the host can confirm the socket is a shaver or IP-rated one before we hand over. We do not run a bathroom film on High for long sessions; that is not what it is for.
Home Offices and Studies
A home office retrofit is, for most buyers, the first room they actually size and install. The two cold points are predictable: the window behind the monitor and the floor under the desk. A convection radiator heats the air, the air heats the monitor stand, and the under-desk air stays cold because the desk blocks the plume. A wall film solves both. Place one panel under the window where the desk will sit, and place a second shorter panel on the wall behind the desk at chair-back height. The window panel takes the cold downdraft off the back of the neck; the chair-back panel warms the wall mass behind the seated person, which is what the body actually registers as “warm room.”
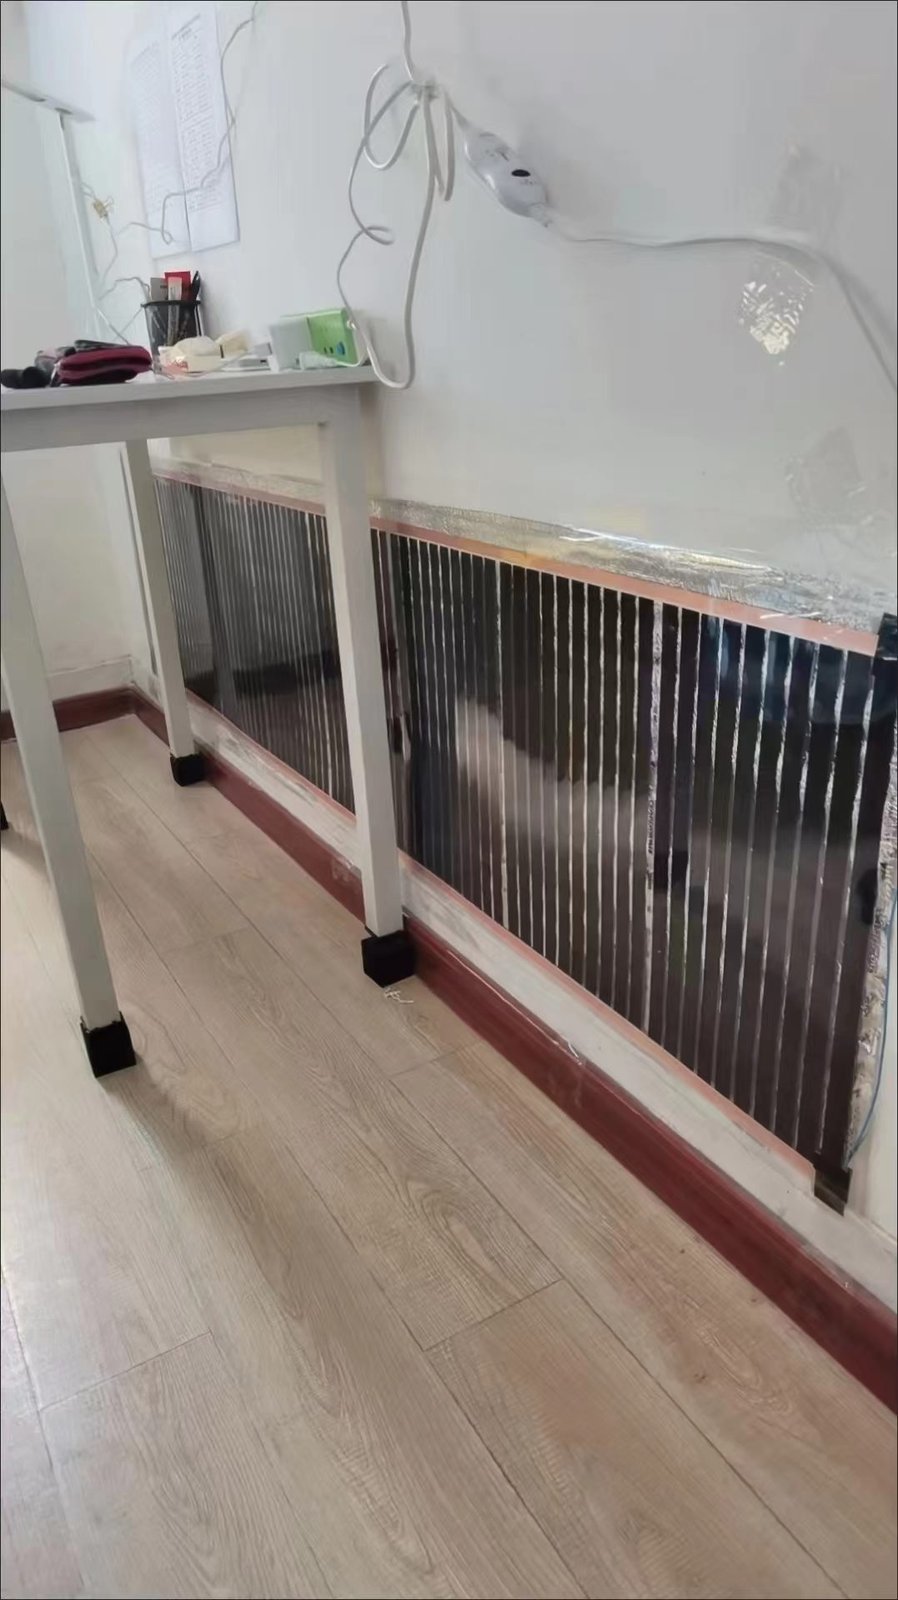
The under-desk cold is the most underrated comfort point in an office retrofit. A film at wall height behind the desk warms the wall, and the wall radiates down to the floor and up to the chair back. You do not need to heat the whole room to 22 °C to be comfortable at the desk; you need the mean radiant temperature around the seat to be a couple of degrees higher. The wall film does exactly that. Power density on an office wall is usually auxiliary: 250 W to 375 W covering a couple of square metres is enough for a four-hour work block, and the user switches it off when they close the laptop.
Because the film is silent and has no electromagnetic emission, it is also the room in a retrofit house where a buyer will most often ask “is this safe to run next to a computer screen for eight hours.” The answer is yes, and it is one of the reasons we have a separate long-tail line in the SEO bank for a wall-mounted electric heater for home office. The fully shielded construction means there is no EMF interference with the monitor, no fan noise to compete with a call, and no air movement to stir a coffee mug or paper stack.
Dining Rooms, Tea Rooms and Hotel Fronts
Commercial retrofits in hospitality follow a different rule: keep the floor clear for service, and warm the back wall where a guest sits. A small restaurant or a tea room does not have space for a freestanding heater, and a wall radiator forces a chair back to sit 30 cm off the wall. A film on the wall behind the chair row warms the guests’ backs, leaves the floor walkway open for the service staff, and leaves the wall finish intact for the next tenant. We have a reference of a two-tier run on a dining room wall and a wood-panel tea shop wall, both of which are the standard hospitality retrofit look.
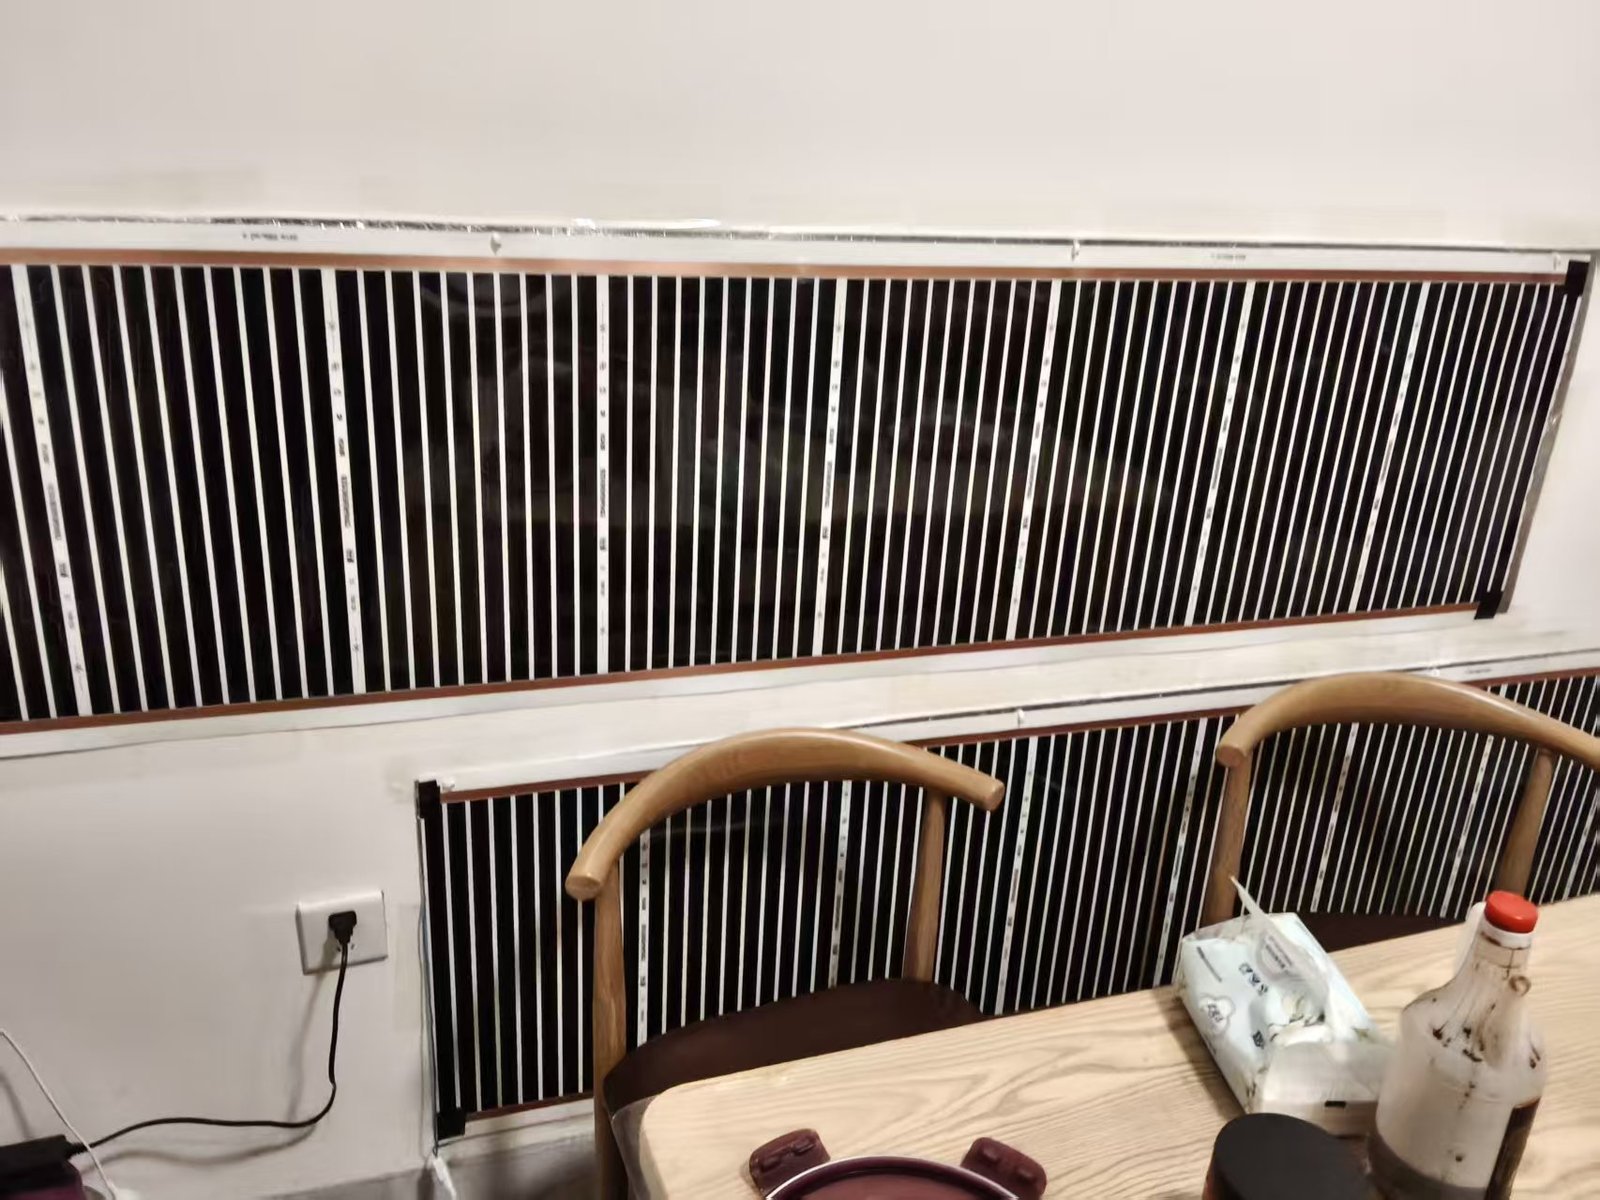
Power density in a dining room is auxiliaries plus targeted boost. The room does not need to be 22 °C at the bar; it needs to be comfortable at the table. We size a run along the wall behind the chairs, and we schedule it on a 30-minute lead before the dinner service and off after the last course. Hotel front desks get a smaller run along the wall behind the receptionist, because the receptionist is stationary for hours and the guest is only standing for two minutes. A 50×150 cm or 50×200 cm run on the back wall is the standard here.
The Building-Condition Checklist
Before you size a panel, walk the wall. The following checklist is the one we give every retrofit buyer. Tick each row, and the panel count and the control strategy write themselves.
| Condition | What to look for | Effect on sizing |
|---|---|---|
| Wall substrate | Drywall, plaster, ceramic tile, wood paneling, wallpaper — all listed as suitable. Damp, lime-washed or crumbling plaster is not. | Adhesive fixing on smooth surfaces; screw fixing through the silver foil border strips on textured surfaces. Never screw through a heating stripe. |
| Cavity insulation level | Inspect the loft, the cavity wall, and the floor above. A wall on an uninsulated cavity side loses a fraction of radiant output into the wall mass. | Size one panel larger than the room would otherwise suggest, and accept auxiliary rather than primary output in the first winter. |
| Window position and orientation | North-facing wall, large glazed gable, single-glazed sash, uncurtained window above the bed. Each one is a cold downdraft source. | Put the first panel under the worst window. The wall under the window is the highest-leverage placement in any retrofit. |
| Power point | Is there a wall socket within 2 m of the proposed wall? Is it on a dedicated circuit? Is it RCD-protected? | Plug-and-play panels need a socket. Fixed-connection panels need a qualified electrician and a local isolator. Plan the route before you order. |
| Zoning need | Is the room used all day? Half the day? Only in the evening? | All-day room: schedule on a thermostat. Evening room: plug-and-play on a timer. Seldom-used room: leave unheated and rely on neighbour-wall warmth. |
| Ceiling height | < 2.7 m is normal. Above 3.2 m, the convection loss problem starts. Above 4 m, treat as high-ceiling retrofit. | Run more linear metres lower on the wall rather than a small hot panel high up. Radiant heating works in the occupied band, not at the ceiling. |
| Wall clearances | Is there a bed, a sofa, a desk or a cabinet within 10 cm of the proposed film? A cabinet on top of the film is the most common retrofit error. | The radiating front face must stay clear. Move the furniture, or move the panel. Never put film behind a cabinet back. |
Power Density: Primary vs Top-Up in Retrofits
The film is rated at 220 V and 500 W per square metre of panel face. That number is easy to misread. It is not a claim that one square metre of panel heats five square metres of room. It is the electrical load per square metre of active surface. Whether that surface is your primary heat source or a top-up depends on the envelope, the climate, and what you already have.
In a retrofit, the vast majority of rooms we size are auxiliary configuration. The existing central heating, gas or oil, stays in place. The film takes the edge off the cold wall, the cold window, and the cold chair-back. The coverage guidance in our spec is indicative: a 50×100 cm panel at 250 W covers roughly 3 to 5 m² as a primary source and 5 to 7 m² as a top-up. A 50×200 cm panel at 500 W covers 5 to 7 m² primary and 7 to 9 m² top-up. A 50×300 cm panel at 750 W covers 7 to 10 m² primary and 8 to 12 m² top-up. These are starting numbers; the final sizing always depends on insulation and climate and should be confirmed with our application engineers.
When do you go primary instead of top-up? Three conditions have to line up. The room needs to be reasonably insulated (cavity insulated, double or triple glazing, a draught-excluded door). The room needs to be small (under about 12 m², the kind of room where a single 50×200 or 50×300 panel is enough surface). And the building has no existing central heating, which is common in a heritage summer house, a garage conversion, or a granny flat that was never plumbed. In those cases we size the film as a primary source, but we still pair it with a SunAura room thermostat so the room does not overshoot when the sun comes through the window.
The top-up configuration logic is what you will use in 80 % of retrofit projects. Work out where the cold points are, put one panel on the worst wall, and let the existing system do the rest. A 250 W panel on a cold bedroom wall on Low for four hours in the evening uses roughly one kilowatt-hour of electricity. Compared with the marginal cost of running a gas boiler for the same comfort, the film is not always cheaper on kWh, but it is cheaper on the cold point it actually solves. That is the trade-off we make explicit in a retrofit, not the one we hide behind a per-square-metre pitch.
Zoning and Thermostats for Renovated Spaces
A single film with a plug-and-play High / Low / Off cord is the right product for one wall, one room, and one occupant. The moment a retrofit project has more than two rooms, you are doing zoning, and you should think about it before you order the second panel.
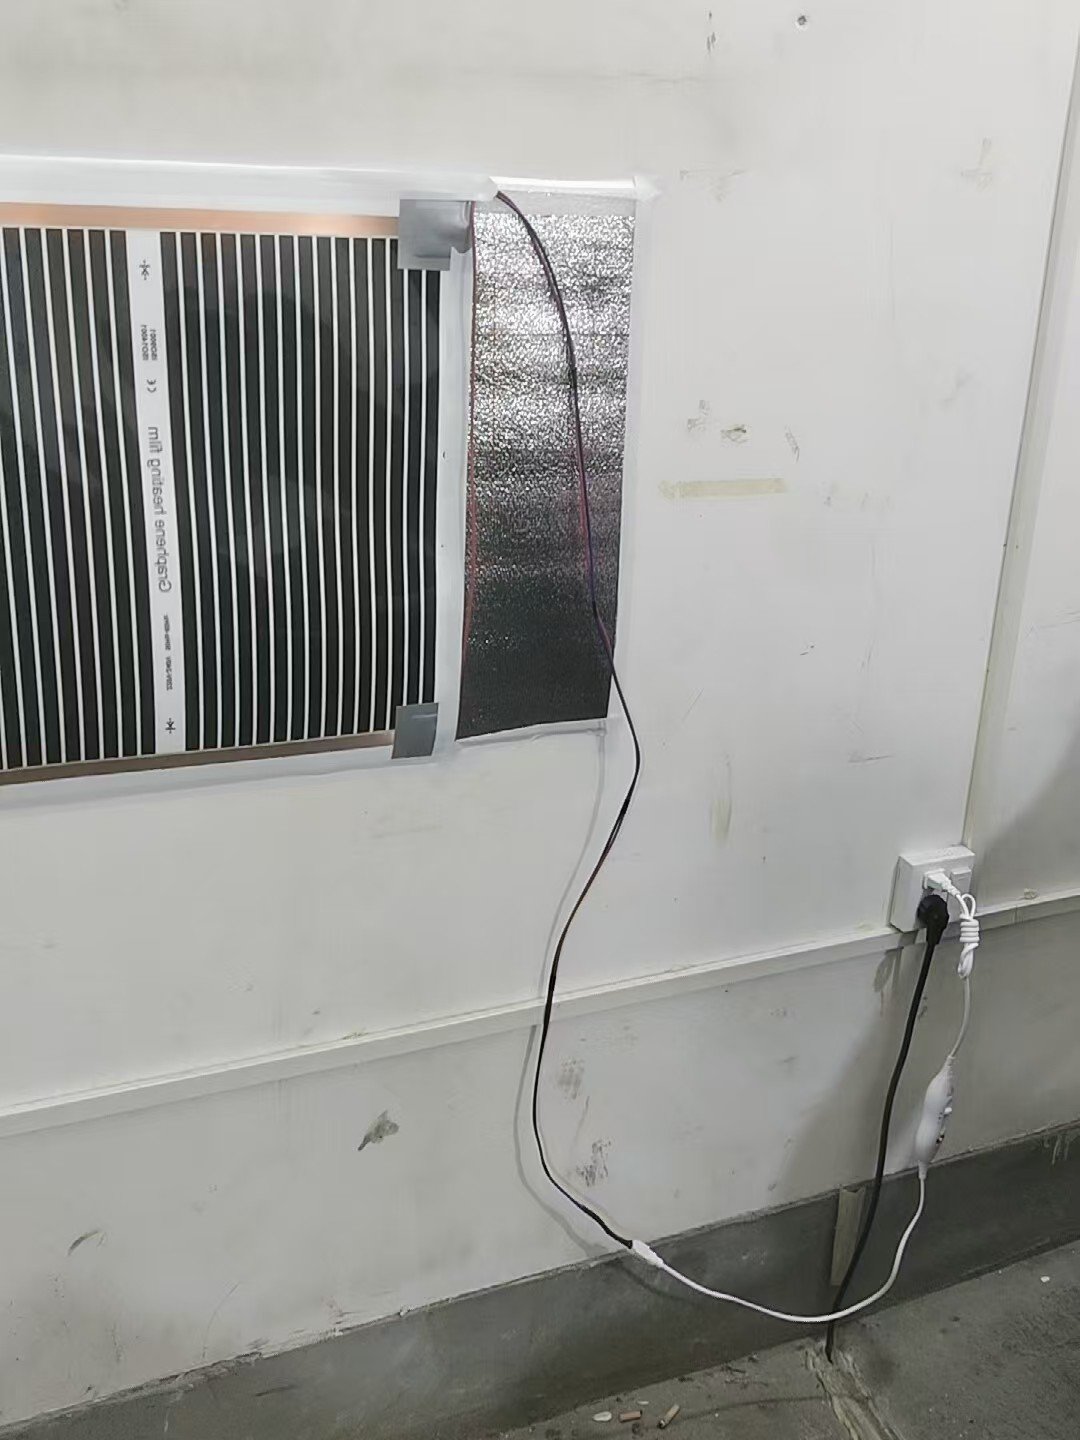
The plug-and-play option is honest. It is an in-line thermostat on the cord between the panel and the wall socket, with High / Low / Off. It requires no electrician, no conduit, and no fixed wiring. It is what we recommend for a rental flat, a holiday home, or a single bedroom retrofit where the user wants the panel up on a Saturday afternoon and the landlord does not want a bill from an electrician. The downside is granularity: one cord controls one panel, and the schedule is a manual decision the user makes each morning.
The fixed-connection option pairs a film with a SunAura room thermostat on a wall. That is the right move when a retrofit project has three or more rooms, when the occupant is out during the day and wants the house warm on a schedule, or when the building already has a smart thermostat system you want to integrate. The film panel is fixed to the wall as before, but the supply is wired into a junction box and the room thermostat is mounted on an adjacent wall. This is an electrician job, and we size the circuit, the load, and the isolator before we hand over.
Zoning logic in a renovated home is simple once you have a room thermostat. Group rooms by occupancy profile. The bedroom zone is on Low overnight, off during the day. The living zone is on for the four hours after work. The home office zone is on during working hours, off otherwise. The bathroom zone is on a 30-minute timer. The spare room stays off entirely. You do not heat the whole house to a uniform temperature; you heat the band each room is actually used in, on the schedule each room is actually used on. That is the operational difference between a retrofit wall heating system that feels generous and one that feels wasteful.
Budget and Timeline Planning
We are not going to quote you a number here. The film price depends on the order size, the plug standard, the controller style, and the destination country, and the honest number comes from our RFQ. What we can give you is the framework to estimate a retrofit project before you call.
Work out the room count first. A typical small retrofit project is three to five rooms: a bedroom, a living room, a home office, a bathroom, and a dining corner. Each room gets one or two panels. Each panel has a film body, a controller, and a wall mounting kit. The plug-and-play installation in a rental flat is a single-person job; the fixed-connection multi-zone project needs a half-day from an electrician. Add a spare controller and a spare cable run, because the one thing a retrofit always needs is a spare.
Timeline-wise, a single-room install is measured in hours. The wall is prepped, the film is cut to length, the backing is peeled, and the film is smoothed onto the wall with a rubber squeegee. The in-line thermostat is plugged in. The panel warms up in about a minute. The decorator comes back the next day and paints around the silver border. A five-room retrofit on plug-and-play panels is a weekend. A five-room retrofit on fixed-connection thermostats is a week, with two days for the electrician and the rest for the decorating to settle.
What you are saving compared with a wet-trades retrofit is the screed, the channel chasing, the floor removal, and the multi-week drying period. What you are spending on is the film, the controller, and the labour that the drywall or tile wall actually takes. The cost conversation with your client is easier when you frame it as “weekend job” versus “three-week disruption,” rather than as a per-square-metre number they will compare to a gas boiler.
Common Retrofit Mistakes
After several years of retrofit support, we have a short list of the same mistakes on every third project. Avoid these and the rest of the installation is straightforward.
- Covering the radiating face. The film must stay wall-mounted and the radiating front face must stay clear. A covered panel raises surface temperature above 100 °C within minutes. Do not run a sofa flush against it, do not put a bookshelf on it, and do not hang a rug over it.
- Mounting behind a cabinet. The cabinet back is the cover. The heat cannot escape. The cabinet warms, the wall warms, and the panel cycles on and off. Move the cabinet or move the panel.
- Ignoring the window cold point. The highest-leverage placement in any retrofit is the wall under the worst window. If you only put one panel in the room, put it there.
- Expecting a wide panel as one strip. Standard film width is 50 cm. Panels wider than 50 cm ship as multiple 50 cm strips on the roll. That is normal. It is not a defect.
- Screwing through a heating stripe. The screws go only on the factory-printed fixing-hole strips on the silver foil border. A screw through a heating stripe is a destroyed panel.
- Running a bathroom panel in the shower zone. The film is for interior wall use above the toilet or beside the vanity, not inside the enclosure. If you need shower-zone heating, that is a different product.
- Running a high-ceiling room on a small hot panel high on the wall. Radiant heat works in the occupied band. Run more linear metres lower down. Do not try to push heat down from the ceiling.
- Leaving the spare room on. An unoccupied room does not need to be 22 °C. Turn it off and let the adjacent wall radiate across.
A Scenario Decision Table
Use this table as a one-page hand-off. Walk the room, tick the row, and the install plan falls out.
| Scenario | Wall to choose | Power logic | Control | Watch out for |
|---|---|---|---|---|
| Rental flat | Headboard wall, window wall, behind desk | Auxiliary; one panel per occupied zone | Plug-and-play High / Low / Off | Reversibility; no structural fixings |
| Heritage building | Smooth plaster run, off the gable wall | Auxiliary; conservative on first winter | Plug-and-play or scheduled zone | Only screw on foil border; never through heating stripe |
| Holiday let | Headboard, window wall, dining wall | Targeted; one panel per guest seat | Scheduled room thermostat | Fast warm-up between turnovers; low maintenance |
| High ceiling / loft | Knee wall, sloping wall below window | More linear metres lower on wall | Room thermostat; avoid cycling | Do not put a small hot panel high up |
| Bathroom | Marble or tile above toilet, beside vanity | Single 250–375 W run, Low | Timer 30 min | Internal wall only; non-flush zone |
| Home office | Under window, behind desk chair back | Auxiliary 250–375 W | Plug-and-play; switch off at close | Under-desk cold; silent; no EMF |
| Dining / tea room | Two-tier run behind chair row | Targeted boost 30 min before service | Scheduled zone | Floor walkway kept clear; service route |
Frequently Asked Questions
Can I retrofit graphene wall heating film without lifting the floor?
Yes. The film is fixed to the existing interior wall with adhesive and positioning tape, with optional screw fixing through the factory-printed silver foil border strips. There is no screed, no channel chasing, and no floor removal. A standard room is finished in a few hours. That is the entire point of the retrofit application. If you are comparing against underfloor heating, our underfloor heating calculator will show you the size difference; for retrofit work the wall film is usually the faster and less disruptive option.
Is the film safe to put on a wall behind a bed or in a child’s room?
The film is fully shielded, so there is no electromagnetic radiation emission. In a child’s bedroom we run it on Low on an open wall, away from the cot rail and away from where the child could touch a curtain against the panel. The surface temperature of an uncovered panel runs around 60 °C in normal operation, so it is warm to the touch but not a burn hazard. The same rule as any wall heater applies: the radiating front face must stay clear.
How do I choose between a plug-in radiant wall panel and a wired zone thermostat?
Plug-and-play is right for one room, one occupant, and a plug within 2 m of the wall. It needs no electrician. A wired zone thermostat is right for a multi-room retrofit where you want a schedule, where the occupant is out during the day, or where the building already has a smart thermostat system. Our application engineers can size the circuit and the isolator for the wired route before you order.
What is the difference between a primary and an auxiliary retrofit configuration?
Primary means the film is doing most of the heating in the room. That requires an insulated room, a small floor area, and no existing central heating. Auxiliary means the film is topping up an existing system on the cold walls and cold windows. Most retrofit projects are auxiliary. The coverage guidance on our spec (3–5 m² primary vs 5–7 m² top-up for a 250 W panel, and so on) gives you the starting numbers.
Can wall heating film be installed over wallpaper or tile?
Yes. The spec lists interior drywall, plaster, ceramic tile, wood paneling, and wallpaper as suitable wall substrates. On a textured surface, we use adhesive on the flat run plus screw fixing through the silver foil border strips. We do not recommend the film on damp plaster, lime-washed walls, or surfaces that are not structurally sound.
How long does a retrofit wall heating project take?
A single plug-and-play room is measured in hours. A five-room plug-and-play retrofit is a weekend. A five-room fixed-connection multi-zone project is about a week, with two days for the electrician and the rest for the decorating to settle. Compare that with a wet-trades underfloor retrofit, which is typically three weeks of screed and drying.
What to Do Next
If you are planning a retrofit project and you want the room-by-room sizing done properly, the cleanest path is to send us the wall conditions from the checklist above and let our application engineers size the panels and the zones for you. You can also read through the wider graphene home heating range to see how wall film pairs with our infrared heating painting and our far-infrared space heater for rooms where wall space is limited. For the SKU-level wattage and RFQ side of the decision, our companion graphene wall heating film buying guide covers the panel table and the specification checklist this article deliberately does not repeat. To request a quote for a retrofit project, head to our contact page and Request Wholesale Price — we will come back with a panel count, a zoning plan, and a lead time for your destination.