
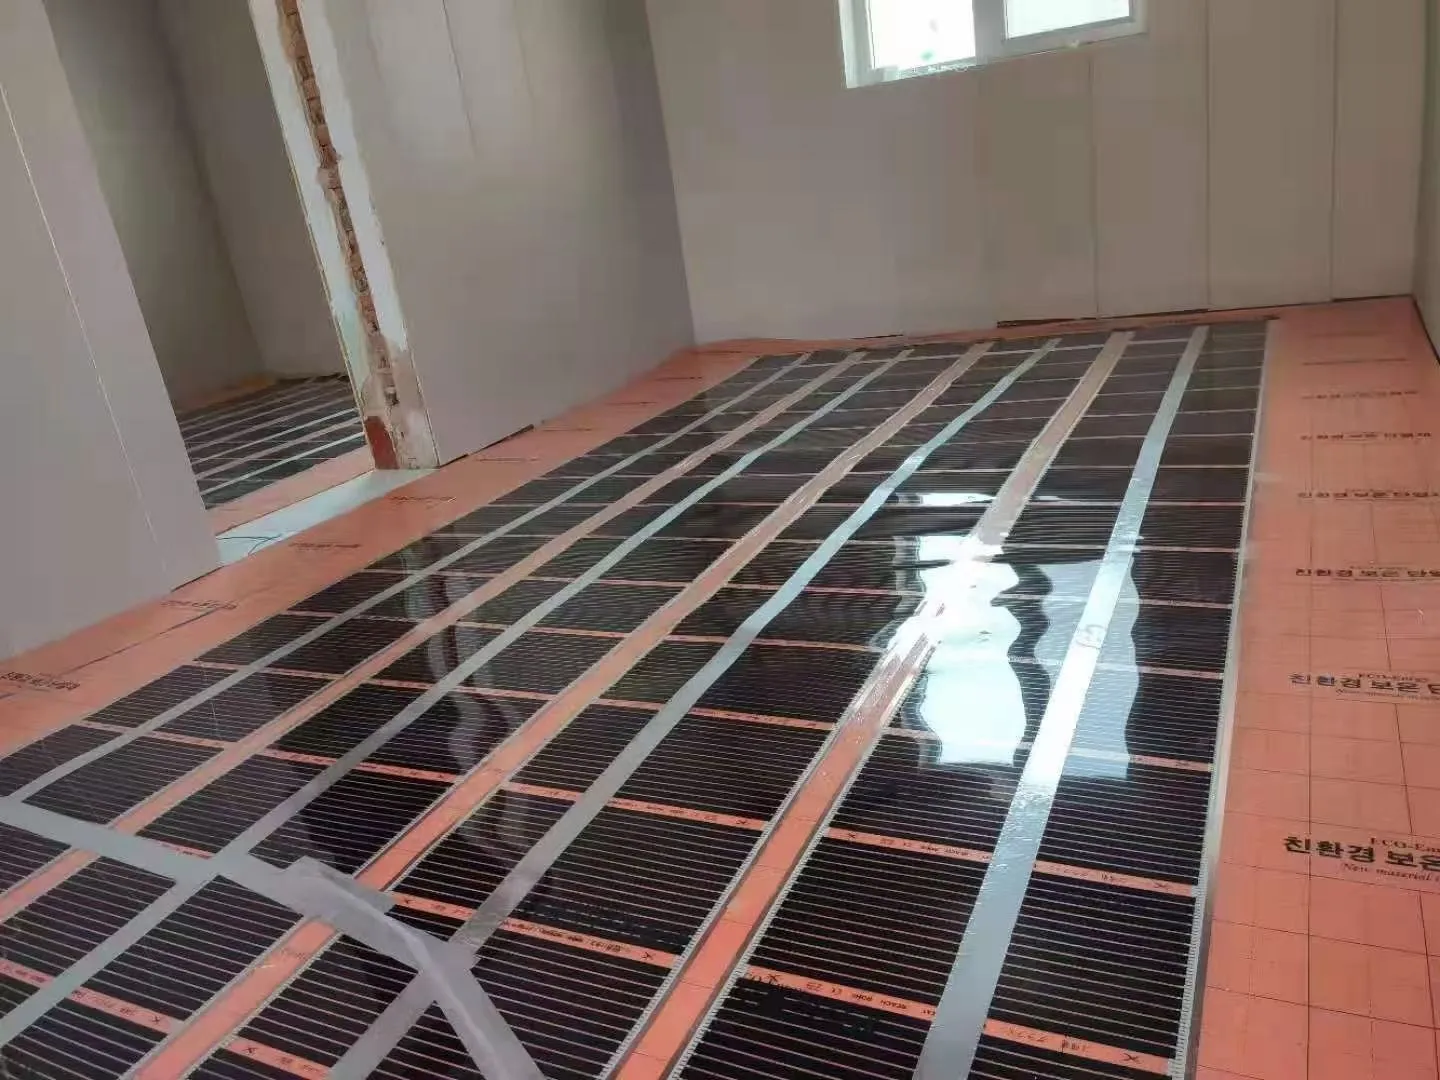
Insulation is the part of an electric underfloor heating project that decides whether the system is genuinely efficient or quietly wasteful. A heating element laid in a floor with little or no insulation will send a large share of its output downward into the ground, where it does nothing for the room. Get the insulation layer right and the same element heats the floor faster, runs for less time and costs noticeably less to operate.
This guide explains how to insulate a floor before installing electric heating: the materials available, how they fit into a solid or suspended floor build-up, the role of damp-proofing and edge insulation, and the common mistakes that undermine an otherwise good installation. It is written for installers and competent homeowners planning a new floor or a retrofit. The underlying concept of thermal resistance is covered in our insulation R-value guide; here we focus on the practical build.
Why Floor Insulation Matters
Heat always moves toward colder surfaces, and the ground beneath a slab is colder than the room for most of the heating season. Without an insulating layer, the concrete or screed acts as a bridge that conducts the element’s heat downwards rather than upwards into the living space. The result is a slow, expensive warm-up and a floor that never quite reaches its potential. Insulation placed below the element creates a thermal barrier that redirects energy upward, shortening heat-up time and reducing the running hours the thermostat demands.
The same principle applies at the edges of the slab, where the floor meets cold external walls — a detail often overlooked but responsible for a surprising amount of perimeter heat loss. Because the insulation is fitted once and then buried beneath the finished floor, it is worth specifying carefully at the start; correcting it later means lifting the screed and is far more disruptive.
How Heat Behaves in a Solid Floor
A typical solid floor is built in layers, and understanding the order helps explain where insulation belongs. The ground and any compacted sub-base are dense and cold; above them sits a damp-proof membrane, then the insulation layer, then the heating element, and finally the screed or floor finish. Because the element is embedded above the insulation, the heat it produces has an easy path upward into the room and a deliberately difficult path downward. This layered logic is the same whether the element is a mat, loose cable or film, and it complements the choice between heating mats and heating cables.
Types of Floor Insulation
Several rigid and reflective materials are used under electric heating; the choice depends on floor type, available height and the load the floor must carry.
Rigid foam boards
Extruded polystyrene (XPS), expanded polystyrene (EPS) and polyisocyanurate (PIR) boards are the most common choice for solid floors. They are strong enough to take the weight of a screed, resist moisture well — particularly XPS — and provide good thermal resistance for their thickness. Boards are laid in a tight, staggered pattern with joints taped or sealed to stop air gaps.
Reflective and multi-foil products
Reflective foil and multi-foil layers are thin, often used where build-up height is limited, and work partly by reflecting radiant heat. They are more common in suspended timber floors and retrofit situations than beneath a heavy screed, and are usually combined with other materials rather than relied on alone.
Edge insulation
Strips of compressible foam run around the slab perimeter, both reducing heat loss at the edges and allowing the screed a small amount of movement. Edge strips are a standard part of a well-built heated floor.
R-Values and U-Values: What to Ask For
Insulation performance is described by its R-value (thermal resistance — a higher number is better) and, for the whole floor, by a U-value (heat loss through the structure — a lower number is better). The insulation thickness and material are chosen to meet a target figure, which is often set by local building regulations. Rather than guessing a thickness, specify the required R- or U-value and select a board that achieves it within the available floor height. The way these figures affect heat-up time and running cost is explained in the R-value guide.
New Solid Floor: The Layer Build-Up
For a new build or a fully replaced floor, the standard sequence, from bottom to top, is:
- Compacted sub-base of hardcore or aggregate, level and stable.
- Sand blinding where needed to protect the membrane.
- Damp-proof membrane laid across the floor and turned up at the edges.
- Rigid insulation boards tightly fitted, staggered and jointed.
- Edge insulation strips around the perimeter.
- The heating element — mat or cable — laid and tested before covering.
- Screed or self-levelling compound fully embedding the element.
- The floor finish, with compatibility checked for the heating system.
The element should always be tested for continuity and insulation resistance before it is covered and again after the screed is laid, so a fault is caught early. The choice between screed and a dry-lay approach is compared in the screed vs dry-lay guide, and cable placement under screed is detailed in the under-screed cable guide.
Insulating Suspended Timber Floors
Houses with suspended timber floors present a different setup, with a void beneath the boards. Insulation is usually fitted between the joists — rigid boards, mineral wool or reflective layers supported from below — while the heating element sits above, often under a thin overlay or between the floor build-up. Good ventilation of the under-floor void must be maintained to prevent damp and rot, and the membrane and insulation should not block the air bricks. The thin profile of an ultra-thin mat is particularly useful here because it adds little height to an existing timber floor.
Retrofit: Insulating Without Lifting the Slab
Where an existing concrete slab cannot be removed, the options are more limited but still worthwhile. The most practical approach is to add insulation above the slab, then the element and a thin covering — accepting the extra floor height and checking the door threshold carefully. Ultra-thin heating mats and a thin insulation board keep the build-up as low as possible. If raising the floor is not viable, improving the room’s wall and loft insulation, draught-proofing and fitting an insulated door still reduces the heat load the floor has to overcome. Tile and self-levelling build-ups are compared in the adhesive vs self-levelling guide.
Damp-Proofing and Moisture Control
Insulation and damp-proofing work together. A damp-proof membrane below the insulation stops ground moisture rising through the slab, which matters both for the floor finish and for protecting the heating element and any moisture-sensitive materials. Boards chosen for ground-floor use should be suitable for damp conditions — one reason XPS is popular. Trapping moisture beneath an impermeable layer without the correct membrane is a common cause of later problems, so the membrane should be continuous and properly lapped.
Materials and Tools Checklist
- Rigid insulation boards of the specified R-value, with a small allowance for cuts and waste.
- Damp-proof membrane and jointing tape.
- Edge insulation strips for the perimeter.
- A multi-meter or insulation tester for the element before and after laying.
- Fixing tape or straps for the mat or cable, and the chosen installation kit.
- Screed, self-levelling compound or adhesive appropriate to the build.
How Insulation Changes Heat-Up Time
A heated screed is a thermal mass: it stores heat and takes time to warm, and once warm it also releases that heat slowly. Insulation below the mass means more of the element’s energy goes into heating the screed rather than losing it to the ground, so the floor reaches a comfortable temperature in less time and holds its warmth longer after the thermostat switches off. This is why a well-insulated floor can be scheduled closer to the time it is needed, while a poorly insulated slab needs a long pre-heat and still loses much of its warmth downward.
Understanding this behaviour also changes how the system should be controlled. Instead of running the heating continuously, a well-insulated, high-mass floor is best run on a timed schedule that brings it up to temperature before occupancy and lets the stored heat carry the room through the day. Trying to force instant warmth by turning the thermostat up does not speed a slab up — it simply asks for a higher target temperature — whereas improving the insulation genuinely shortens the warm-up. The same scheduling logic is used with off-peak tariffs, where the slow heat-up can be shifted to cheaper hours.
Floor Coverings and Their Effect on Heat Distribution
Insulation below the floor is only half of the picture; the finish above it also affects how heat reaches the room. Dense, conductive finishes such as tile and stone transfer heat well and are ideal over electric heating, while timber and engineered wood need temperature limits to avoid damage. Thick carpets and high-tog underlays add a layer of thermal resistance above the screed, trapping some of the heat and slowing its release — which is why floor-covering compatibility and tog ratings should be checked at the design stage rather than after the floor is finished.
This does not mean carpet cannot be used, but the system may need slightly higher output or a longer warm-up to compensate, and the thermostat’s floor sensor becomes important to keep the slab within safe limits. The general principle is to keep the heat path both well insulated below and reasonably open above, so the energy the element produces is not blocked on either side. Matching the finish to the heating system is covered further in the wattage and floor-covering guidance.
Common Insulation Mistakes
- Leaving the floor uninsulated — the single biggest cause of wasted energy in an electric heated floor.
- Gaps between boards left untaped, creating thermal leaks and uneven warmth.
- Forgetting edge insulation — perimeter heat loss and a cold band around the room.
- Using the wrong board below a screed — materials not rated for the load or for damp can fail.
- Blocking under-floor ventilation in suspended timber floors, leading to damp and rot.
- No damp-proof membrane — rising moisture damages the build and the element.
- Covering the element before testing — a fault becomes far harder to fix once buried.
Frequently Asked Questions
Can I add insulation to an existing floor without digging it up? Yes, by fitting thin insulation above the slab, then the element and a thin covering — provided the extra height and door clearance allow it.
Which insulation is best under a heated screed? Rigid foam boards such as XPS, EPS or PIR are the standard choice because they are strong, moisture-resistant and offer good thermal resistance.
How thick should the insulation be? Thickness is set by the target R- or U-value rather than a fixed number, and should meet local building regulations.
Do I need edge insulation? Yes. Perimeter strips reduce edge heat loss and accommodate slight movement in the screed.
Does the heating element go above or below the insulation? Above it. The insulation sits below the element to direct heat upward into the room.
Does better insulation let me install a lower wattage? It can reduce the running time and the heat load, but the element should still be sized to provide comfortable warmth in the room; insulation improves efficiency rather than replacing output, so the wattage should be confirmed against the whole-room calculation rather than reduced on insulation alone.
Related Products & OEM Inquiries
SunAura Thermal supplies the elements that sit above the insulation — heating mats, heating cables, complete underfloor systems and installation kits, together with matching thermostats. As a manufacturer with 17 years of production across automated lines, we support distributors and brands with custom wattage and sizing, private-label options and CE, RoHS and ISO documentation. Send us your floor type, available build-up height and target insulation value and we can help specify the system.